Huyen is expecting a baby (Valin) so we decided to build her and Dat a crib.
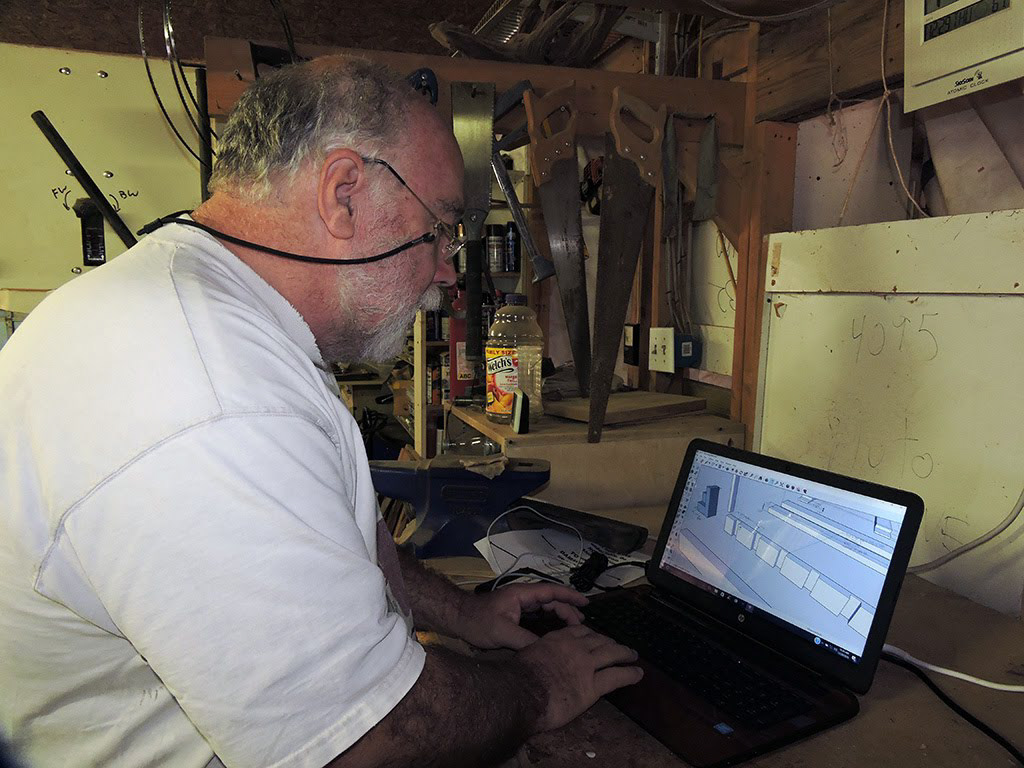
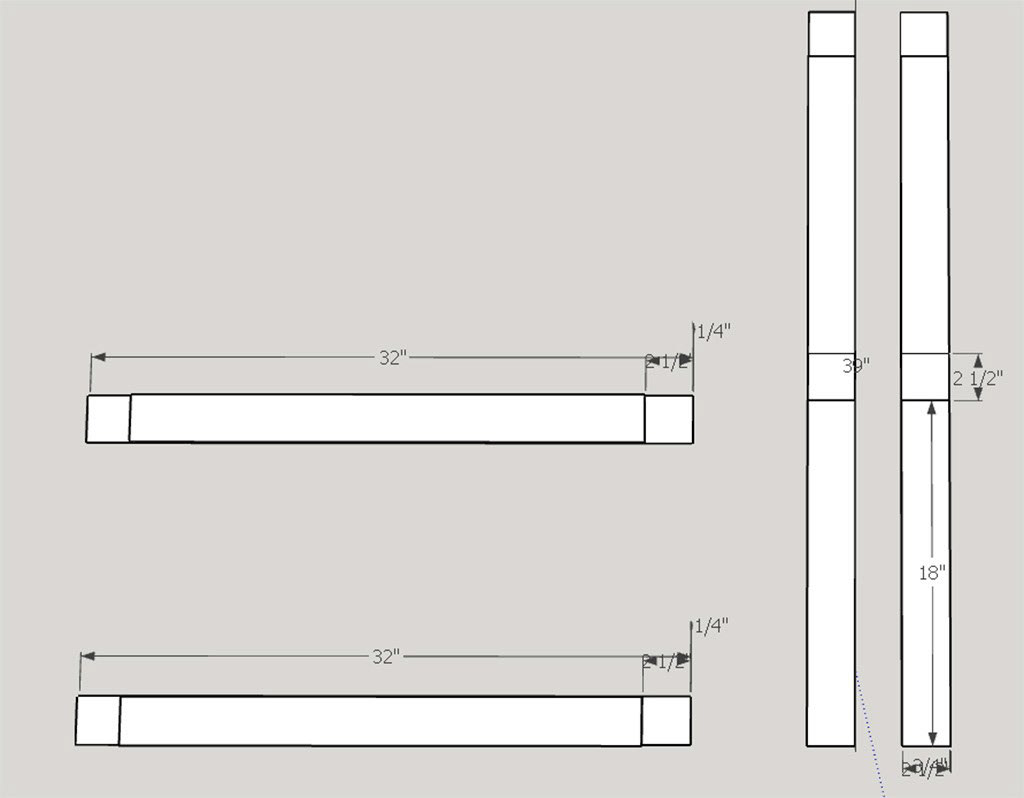
First designed in Sketchup:
The more difficult part is the 2 side rails with all their bars. Safety regulations mandate a space between 2 bars of no more then 2" and 3/8" (60mm!) which--to me-- is either severely premature or growth restricted, and neither of these would possibly crawl through the bars... but anyway that is what we designed it for anyways. The bar width is 3/4" (18mm) and thus we had to space this evenly. Looking on line a baby mattress is typically 27" by 52" We added a little wiggle room around so that the sheet can be folded around the mattress and some blanket can be inserted.
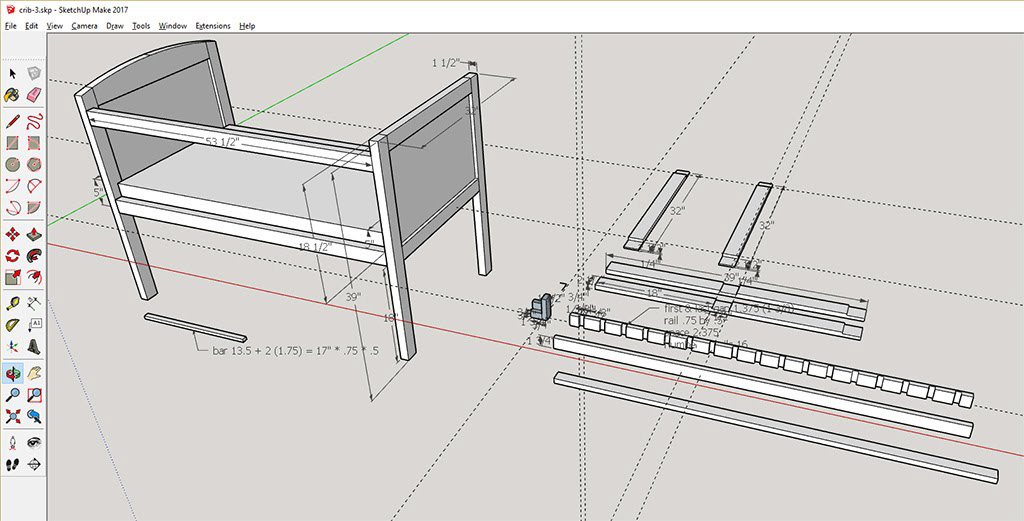
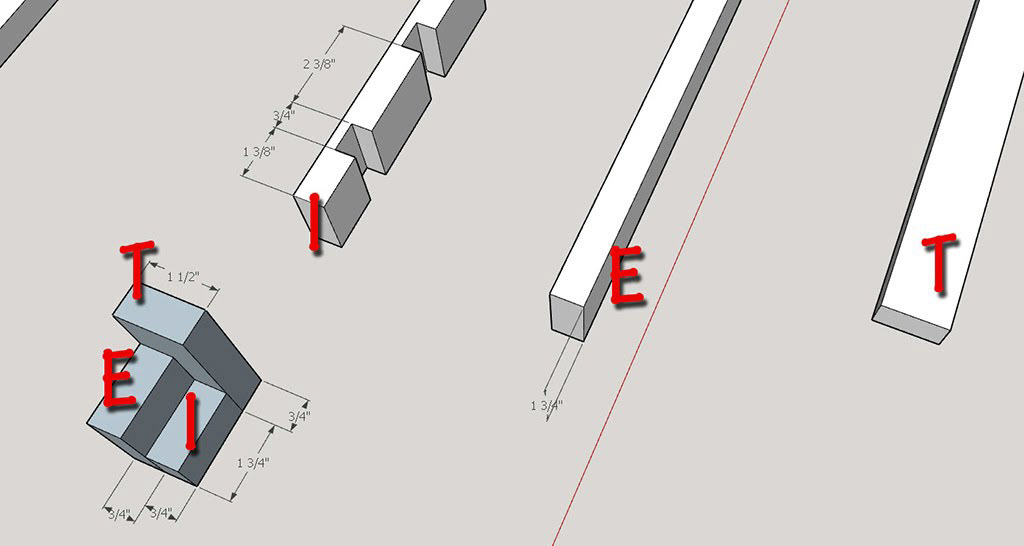
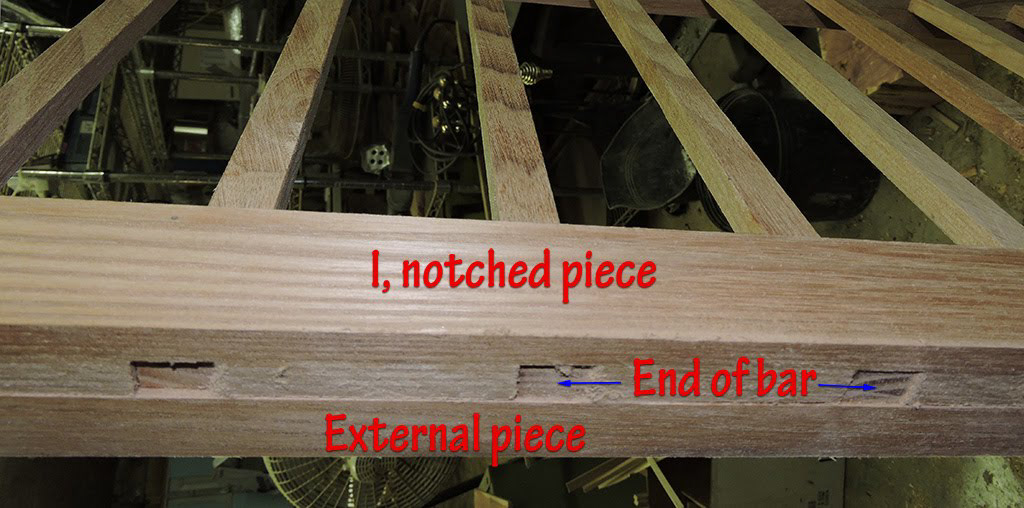
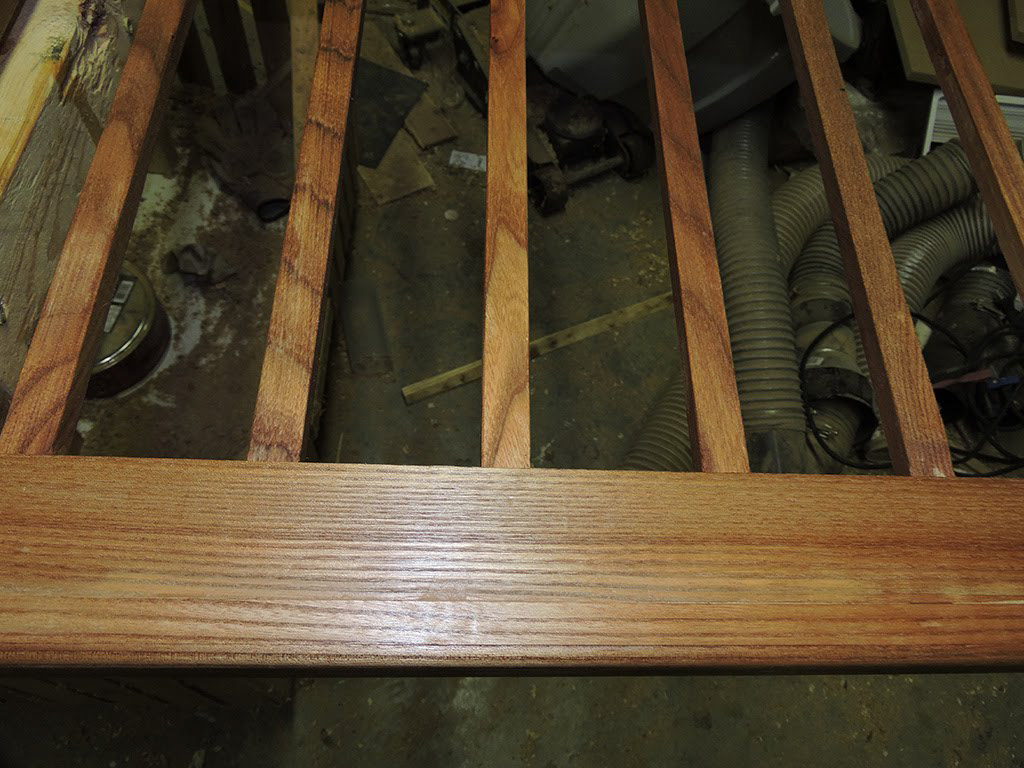
The rails have a composite top and bottom bar made of 3 piece of wood: internal (I), external (E) and top (T). The internal piece is notched to receive the vertical bars, the external piece covers the joints between "I" and the bars, and the top piece hides the "holes"
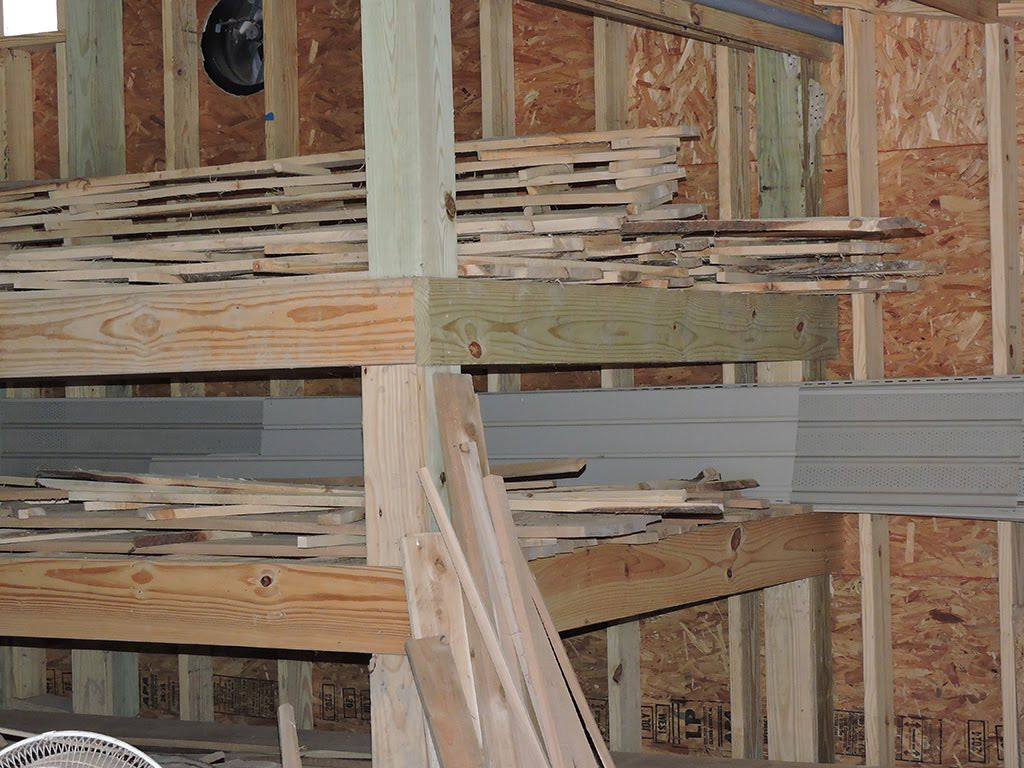
We had cut a dead tree last year (possibly a linden - basswood) and it has beautiful grain: here it is drying in the shed:
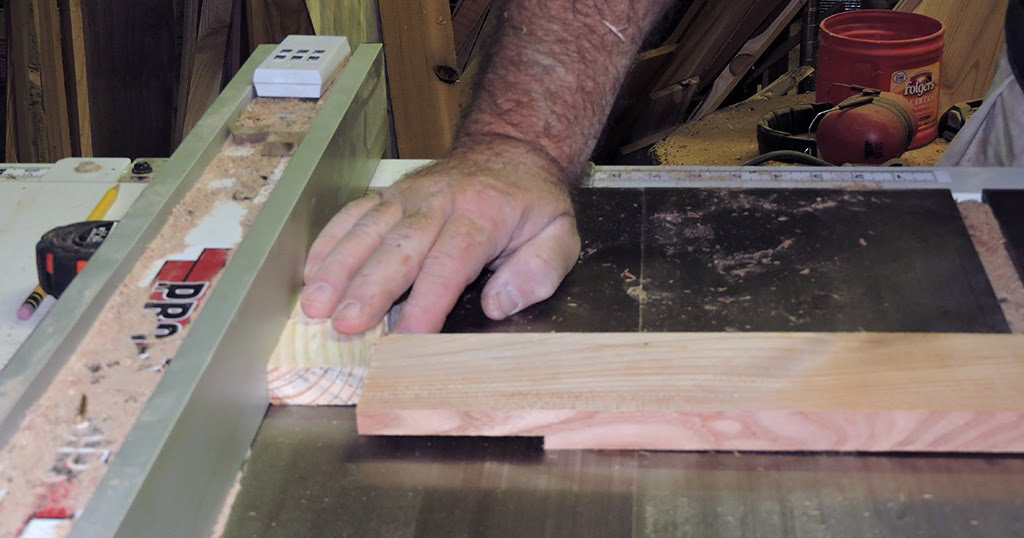
To make the space even between the bars, I build a spacing jig: a miter gauge extension fence with a notch, and in that notch a piece of wood of the exact dimension of the bar:
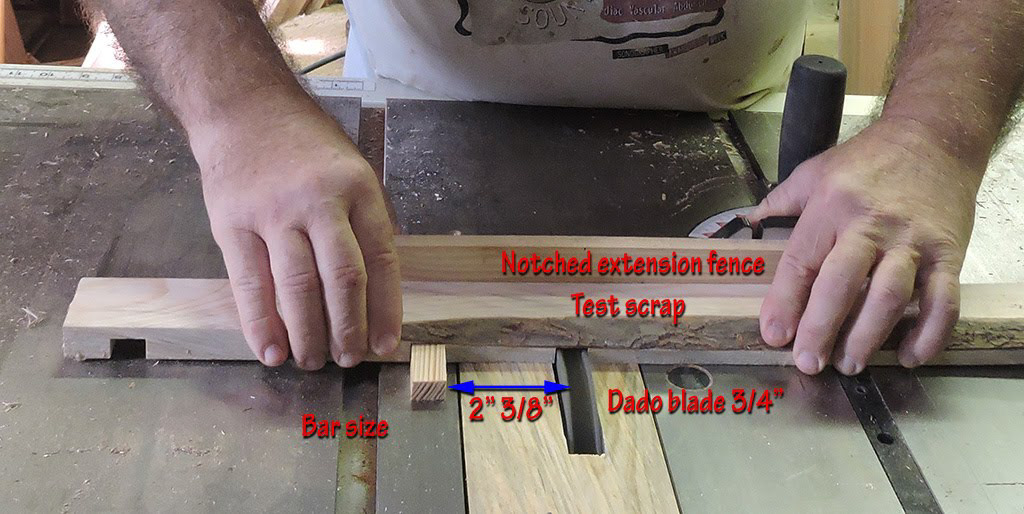
To make evenly spaced cuts, make the first cut, then move the cut over to the "bar size" marker and repeat. Perfect spacing every time :)
(Still a bit frightening to get one's fingers so close to that dado blade !)
Tadaa
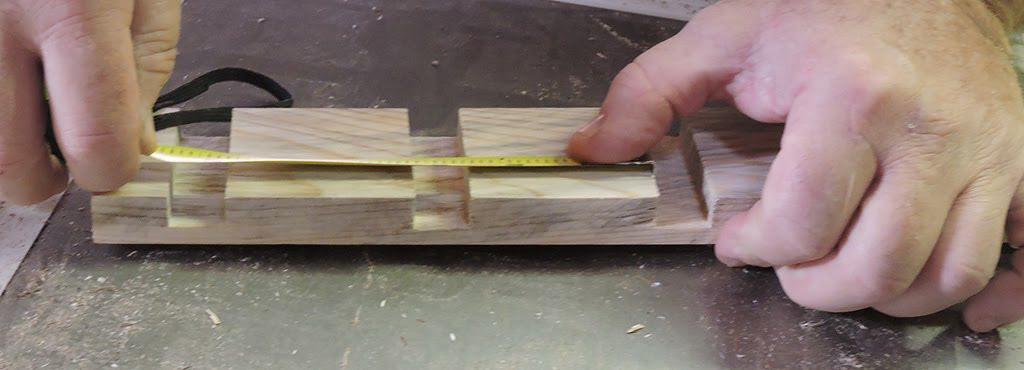
The notched and external pieces are made
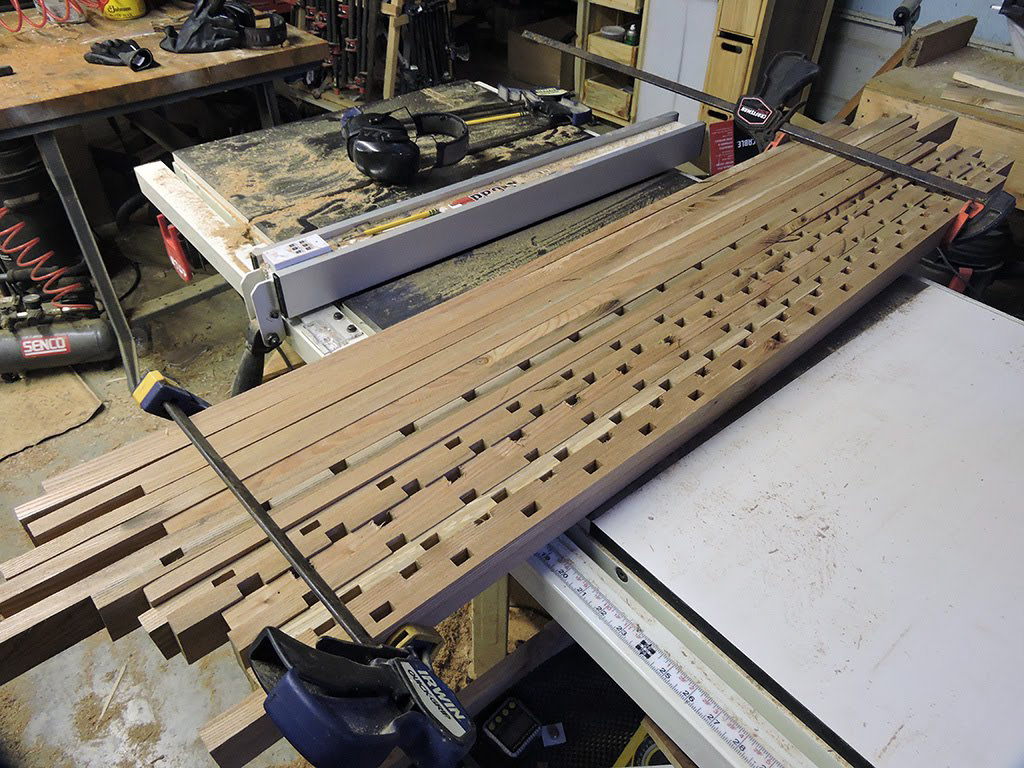
Then bundles of bars all fitting perfectly:
Well... almost perfectly :) Some were a little proud!
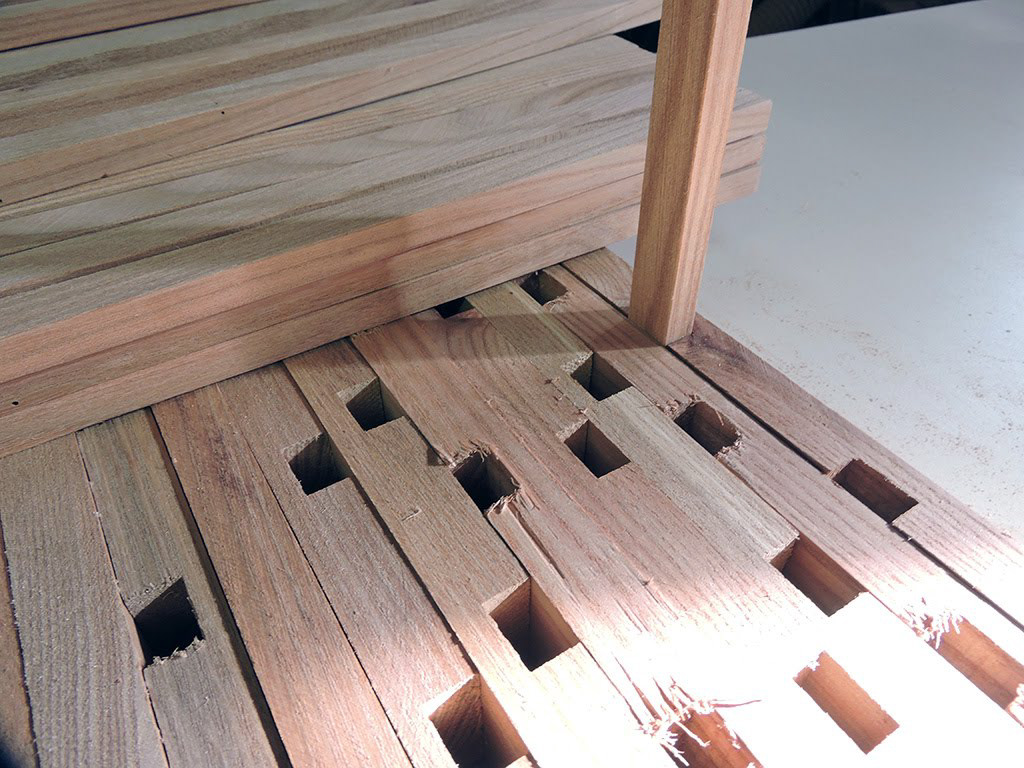
Nice friction-fit

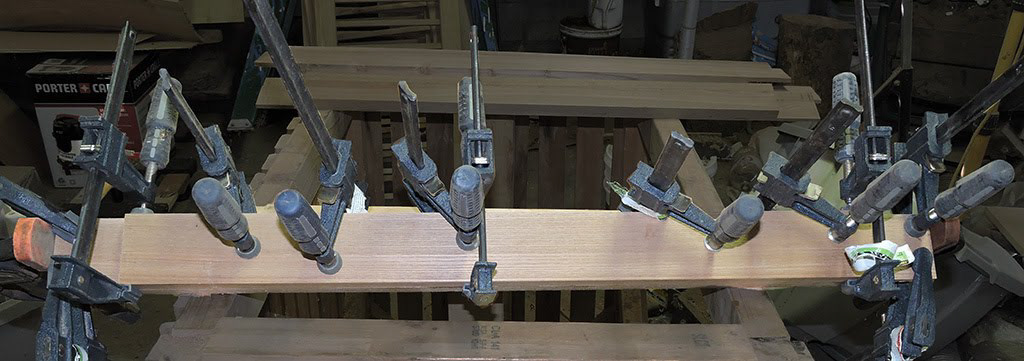
and a ton of clamps:
The bars glued between the internal notched piece and the external piece:
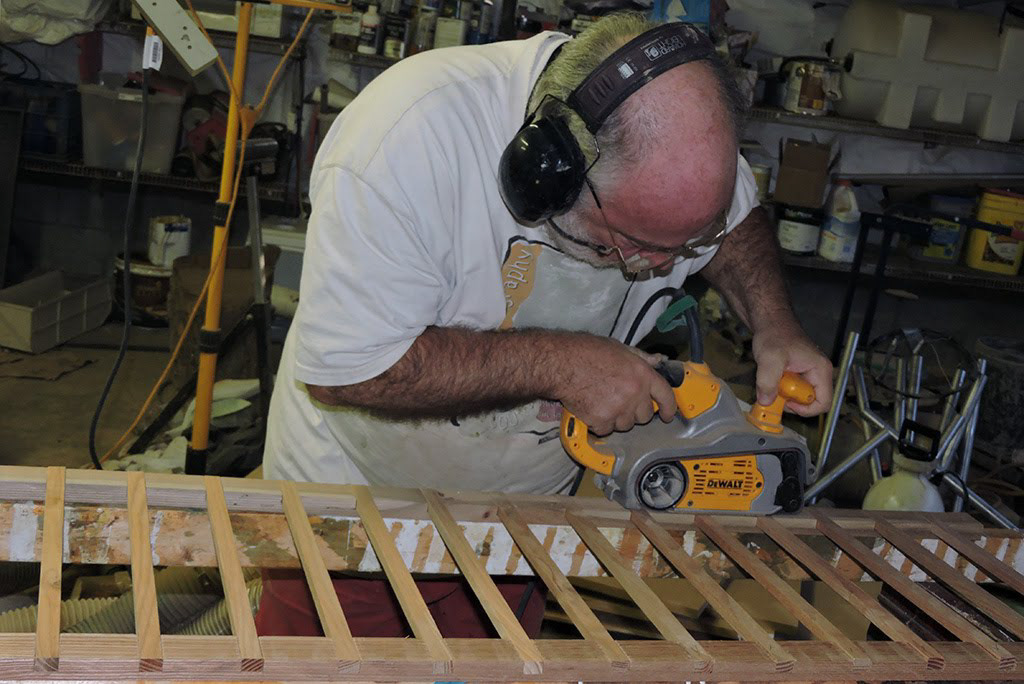
Planing the joints before gluing the top piece (a blizzard of wood shavings !):
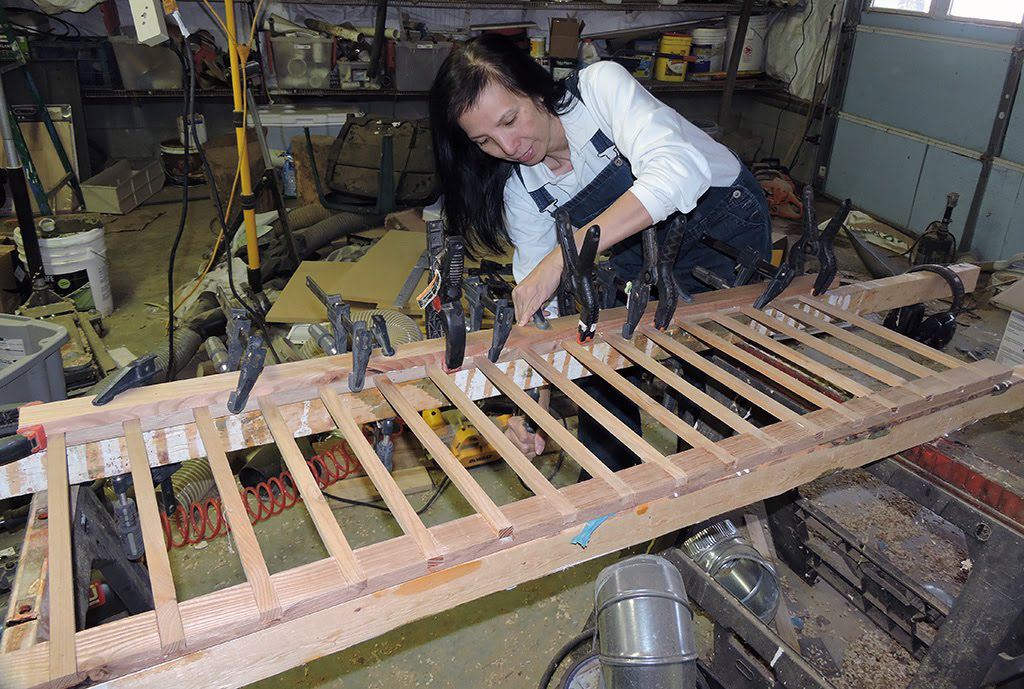
The top piece is now glued and Thao cut the ends to rough dimensions:
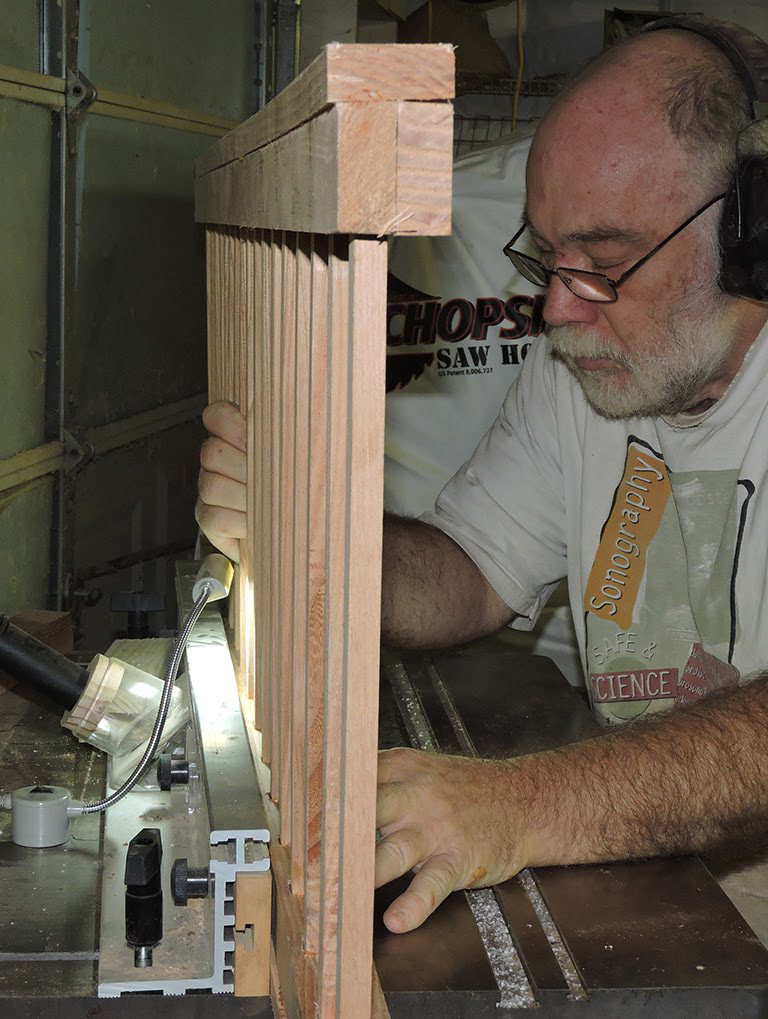
The top piece is made too wide as it would be impossible to glue perfectly aligned matched pieces. So now using a trim bit, the overhanging parts of the top piece are made flush with the rest:

This was my first time doing this! A little wobbly !
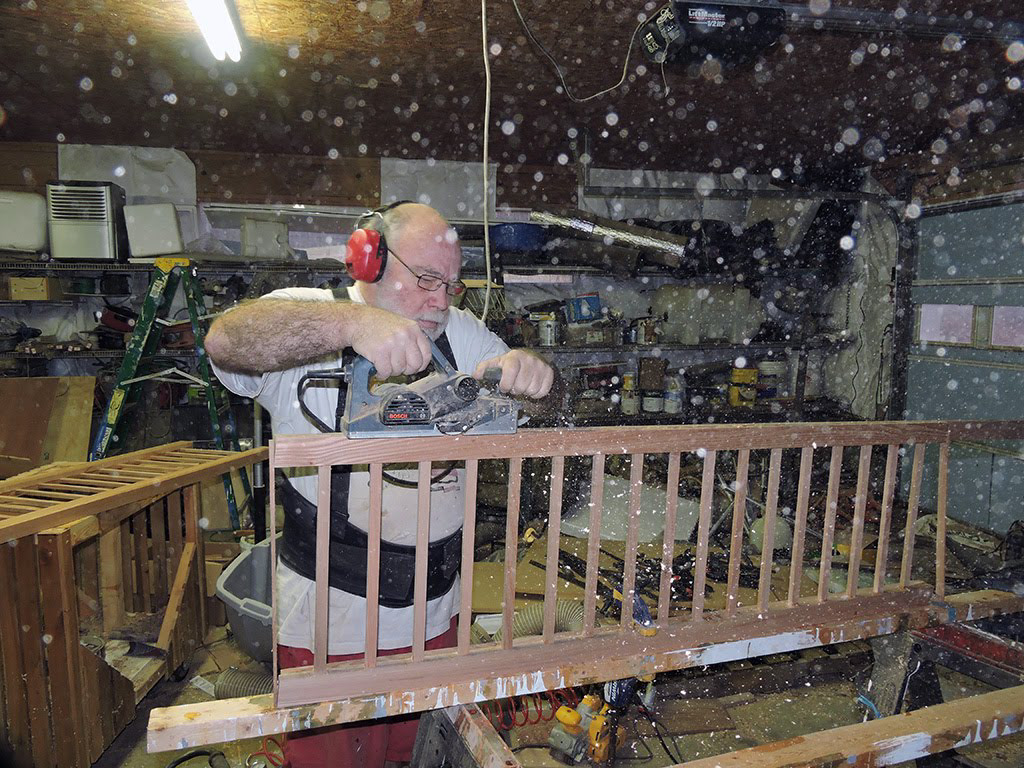
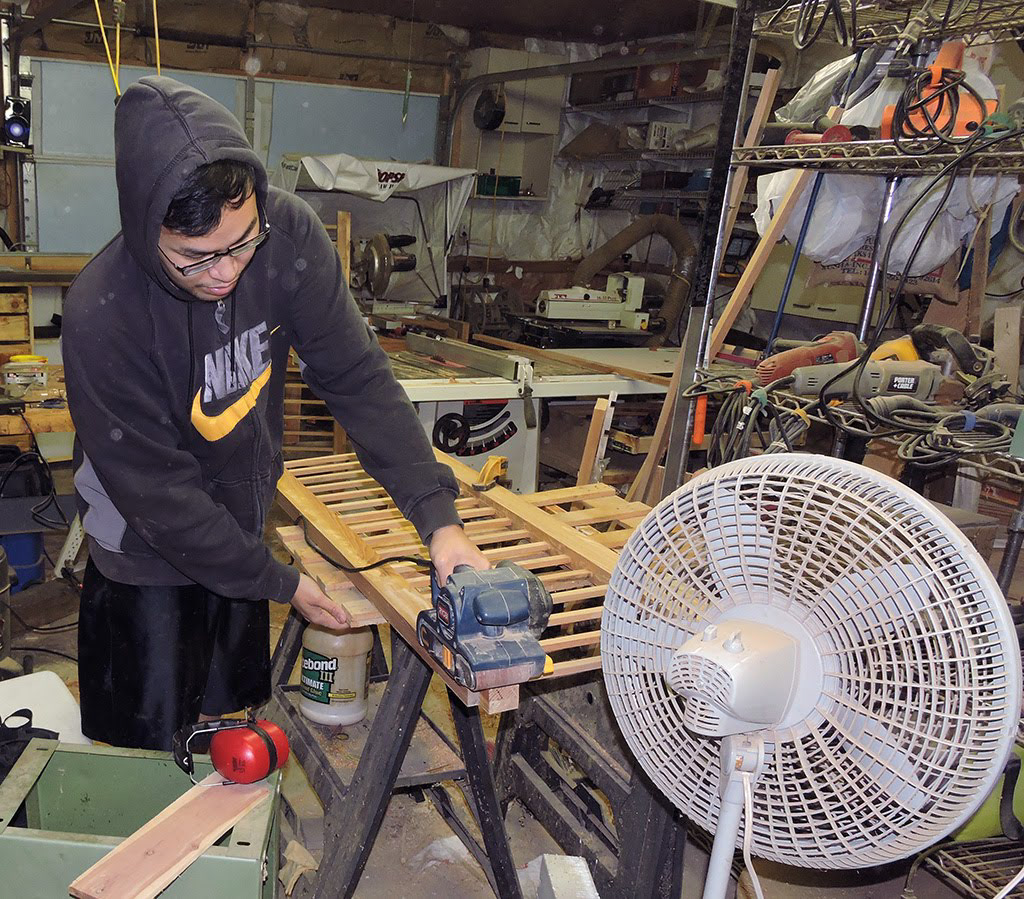
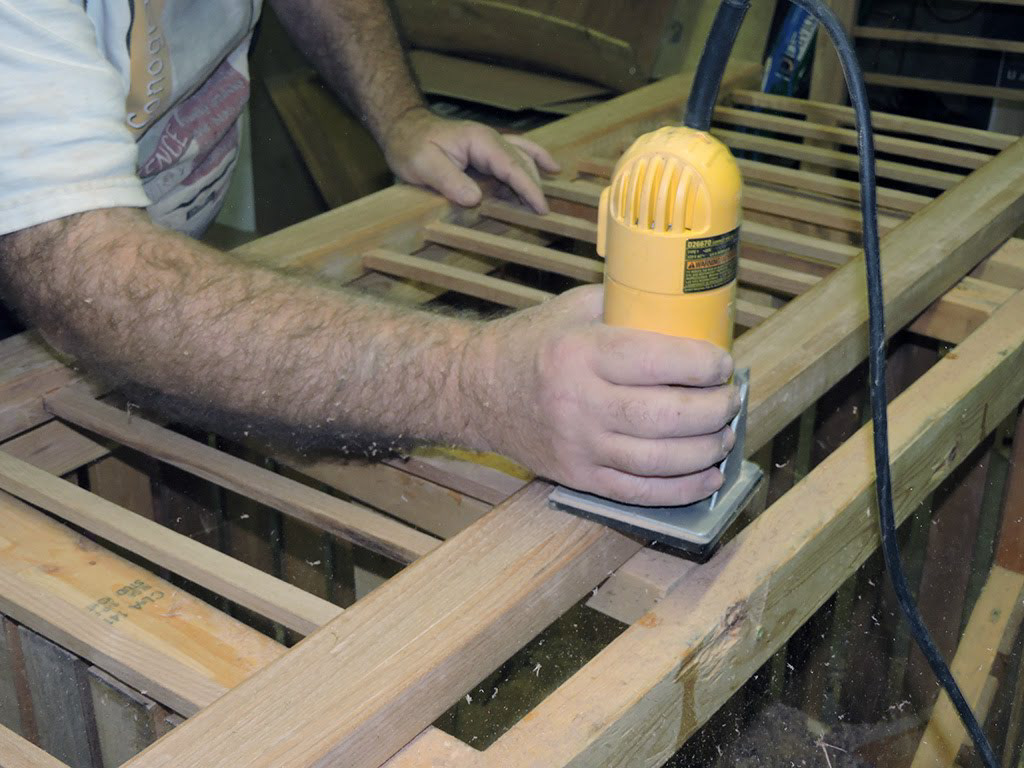
Dat and Huyen doing some detail sanding:
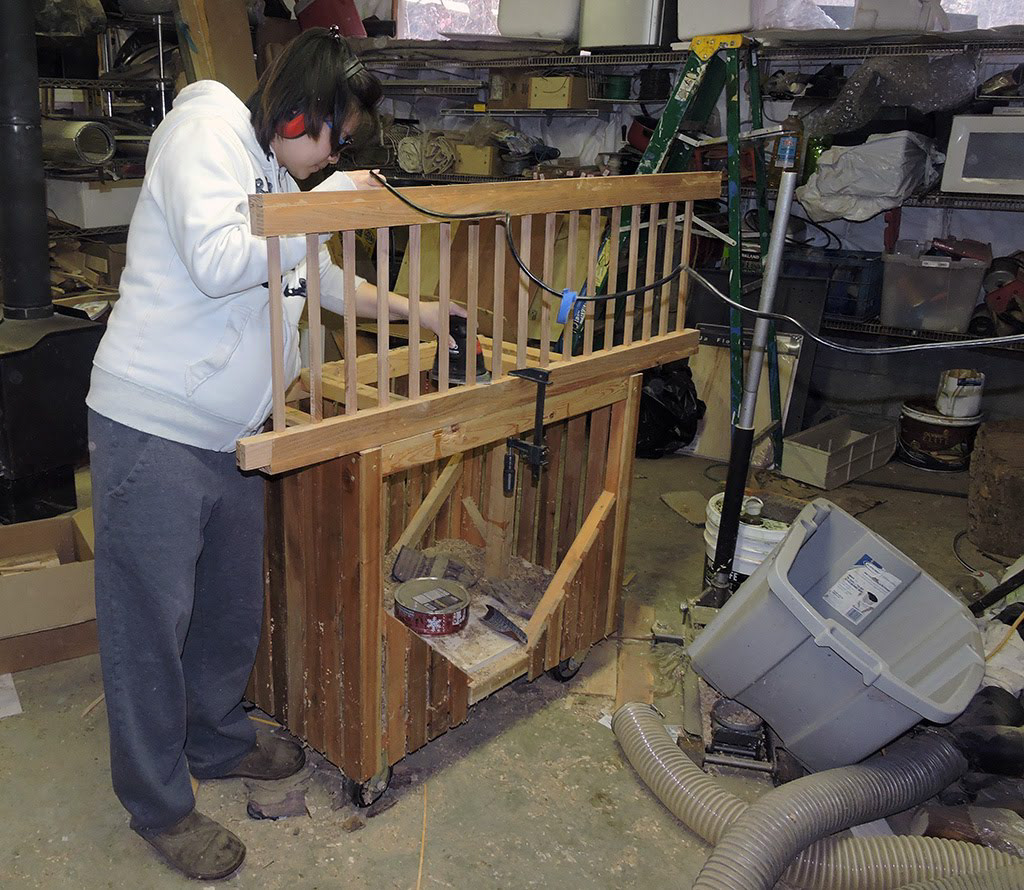
Rounding off the corners:
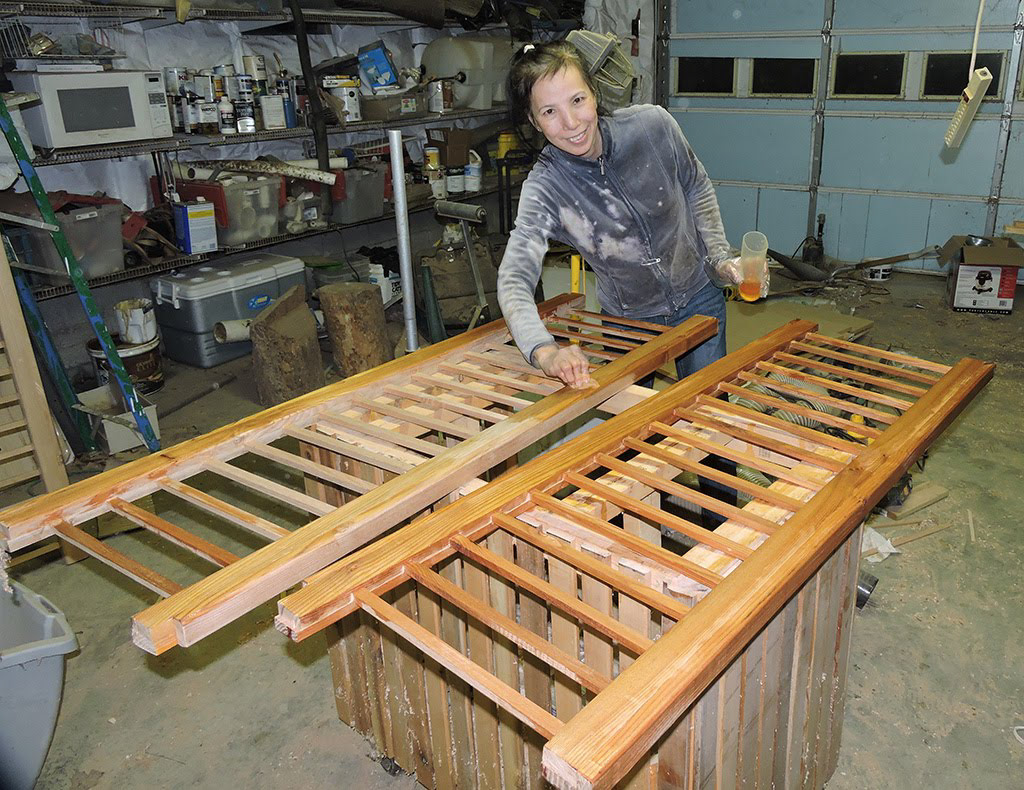
Now time to work on the legs. They are made of vertical bars (again an external and internal side) and two transverse bars (top and bottom):
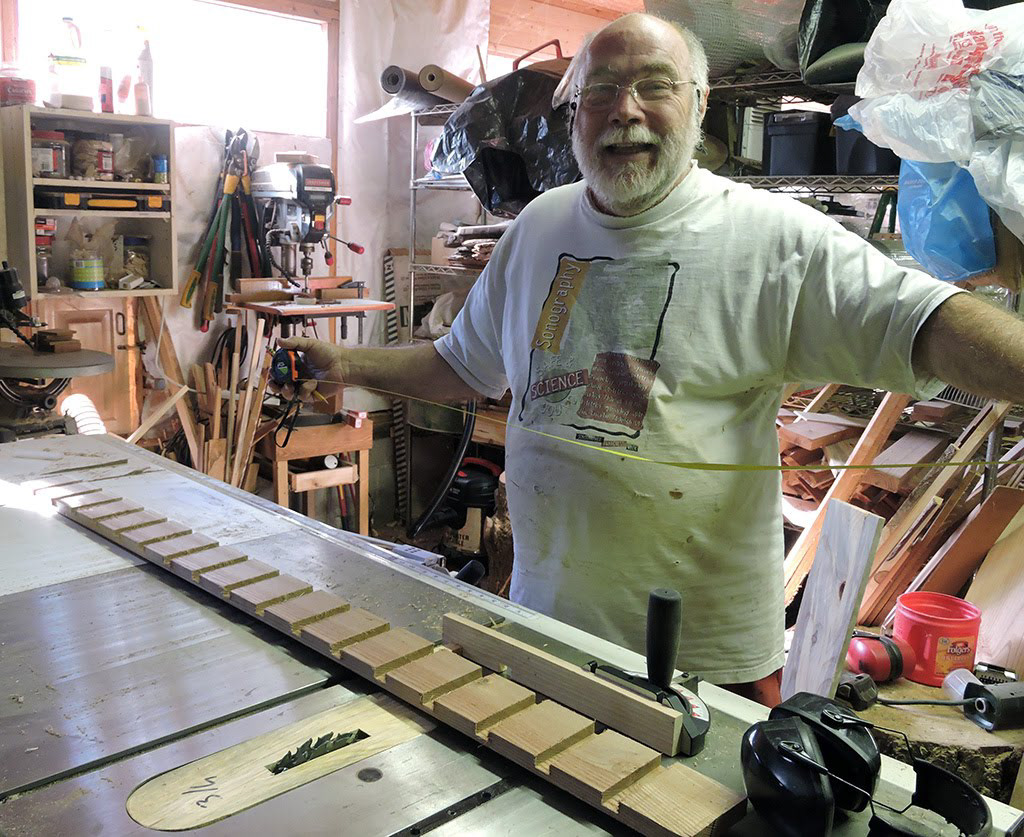
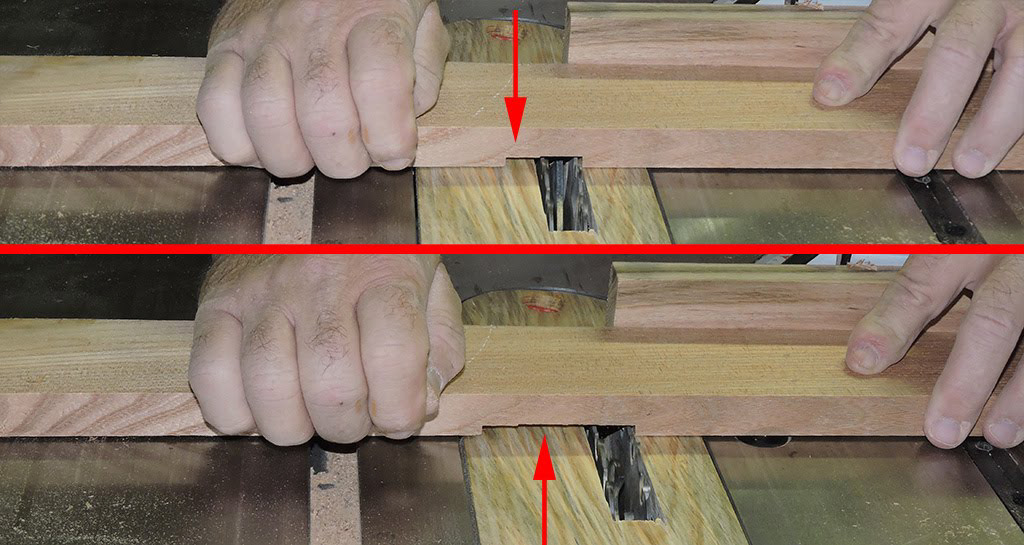
To avoid having to remeasure each piece I made a spacer whose width equal the notch I need, minus the dado blade width:

By making the first cut at the distance of the spacer I can then move the board until it touches the fence:
Several passes through the notch:
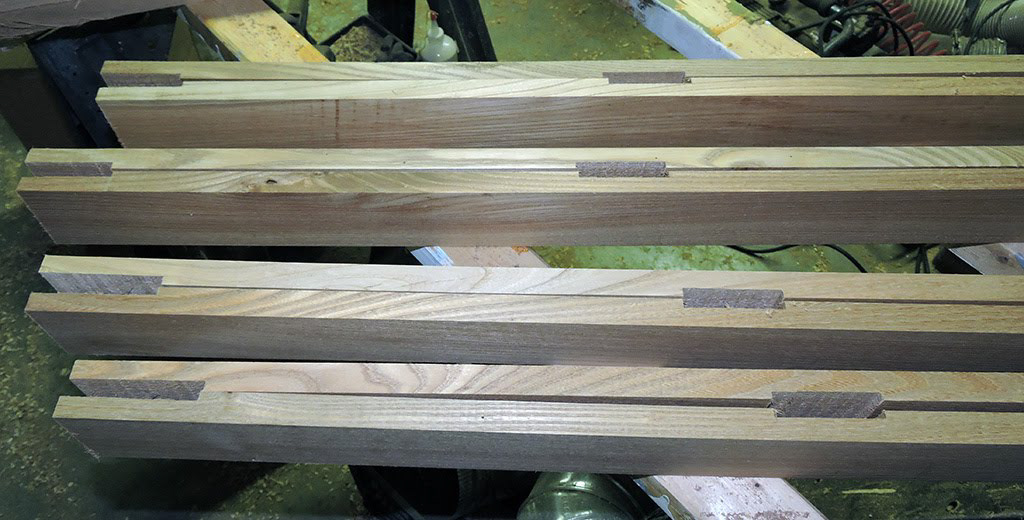
The matching pieces of the legs (the two in front have a larger notch as they will be part of the head board, the others are for the foot board):
A trial for engraving the top board of the head board:
Thao using a fairing stick to make the top curve:
Practicing cutting the curved top on the band saw:
And the top board :)
Next was to prepare the top and bottom transverse bars for the head and foot board.
The transverse bars (right superior on the drawing) are mortised into the legs, and made of a front and back side glued together:

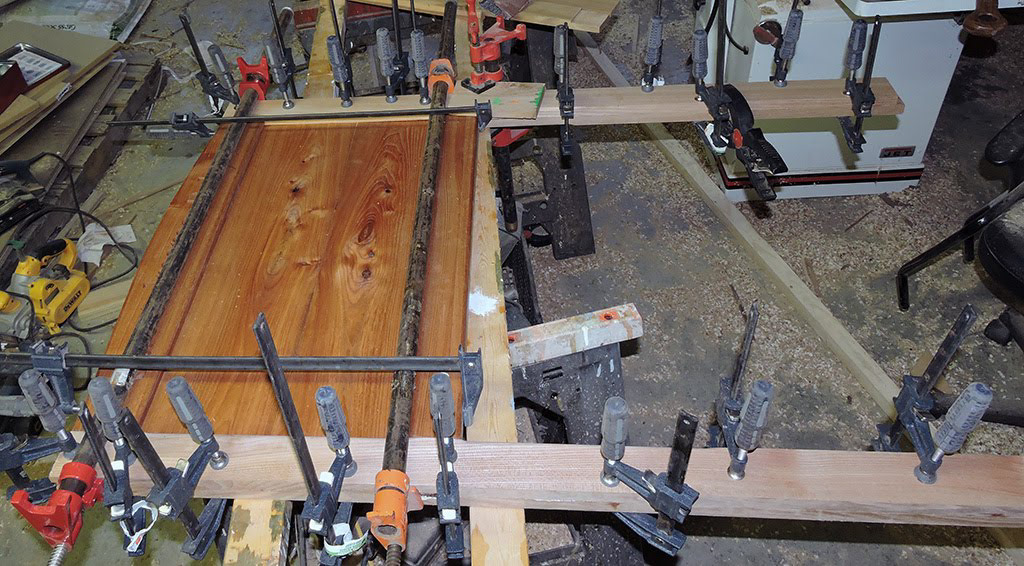
A forest of clamp !
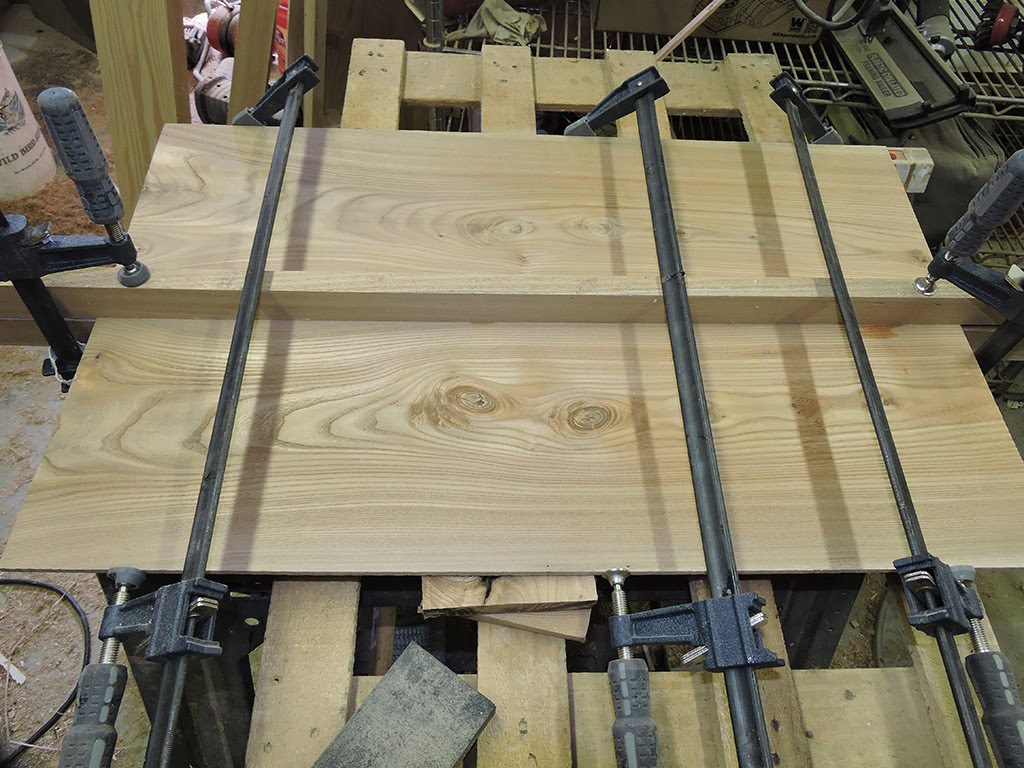
Time to glue the head and foot board panels.
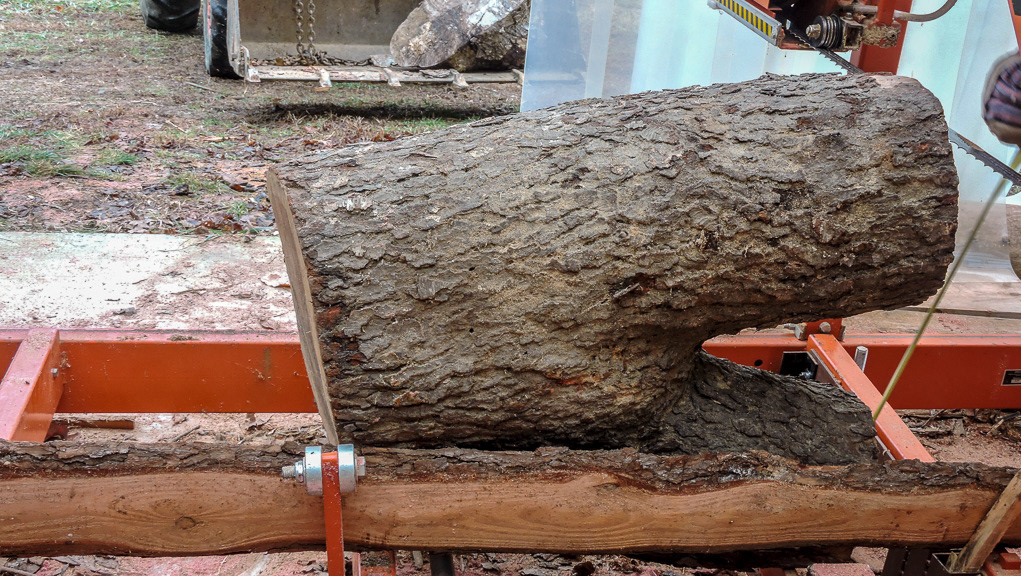
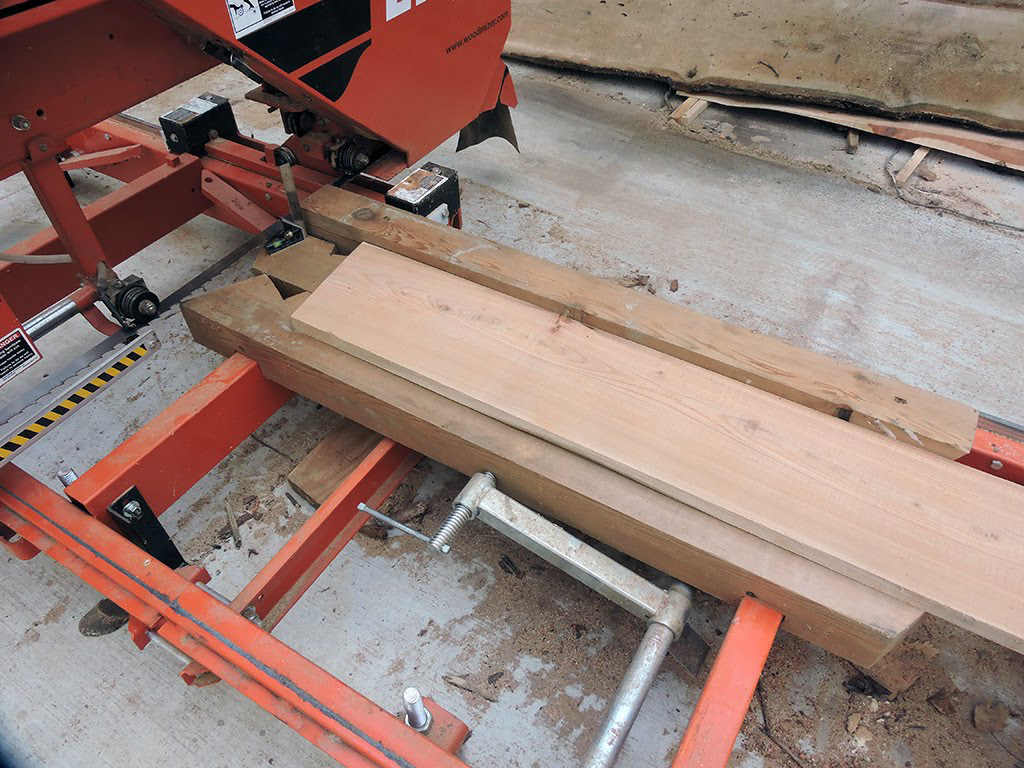
They are made by slicing on the sawmill a 1" thick board. This is a really scary technique: the sawmill is kept stationary (well as much as possible), a set of beams lift the board of the bed and another beam (on the right on the image) prevents the board from moving out. Then the board is pushed into the blade.
The scary part is that I am on the cutting side of the blade pushing the board into the blade! Not the time to trip !! For the last 2 foot of board I push with a stick of course !
This technique is probably not endorsed by OSHA :)
The boards are "book-matched". They are really pretty!
First of 3 layers of polyurethane (more will follow). We mix the polyurethane with paint solvent (about 75%-25%) so it lays on a much thinner layer that dries faster and is easier to apply with just a rag.
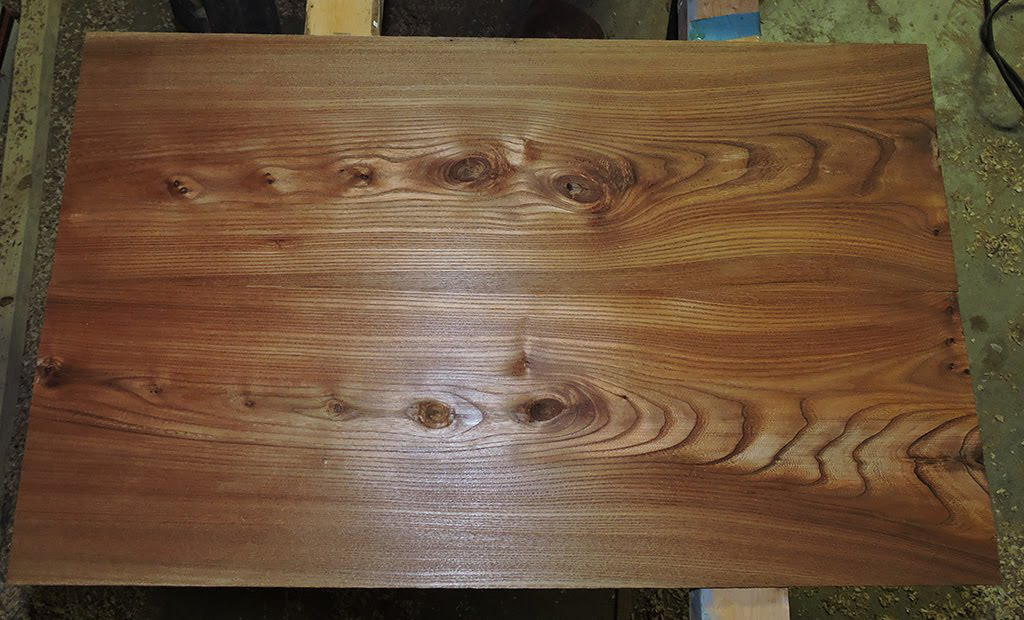
That mystery wood (basswood ?) is pretty, with nice rays and iridescence:
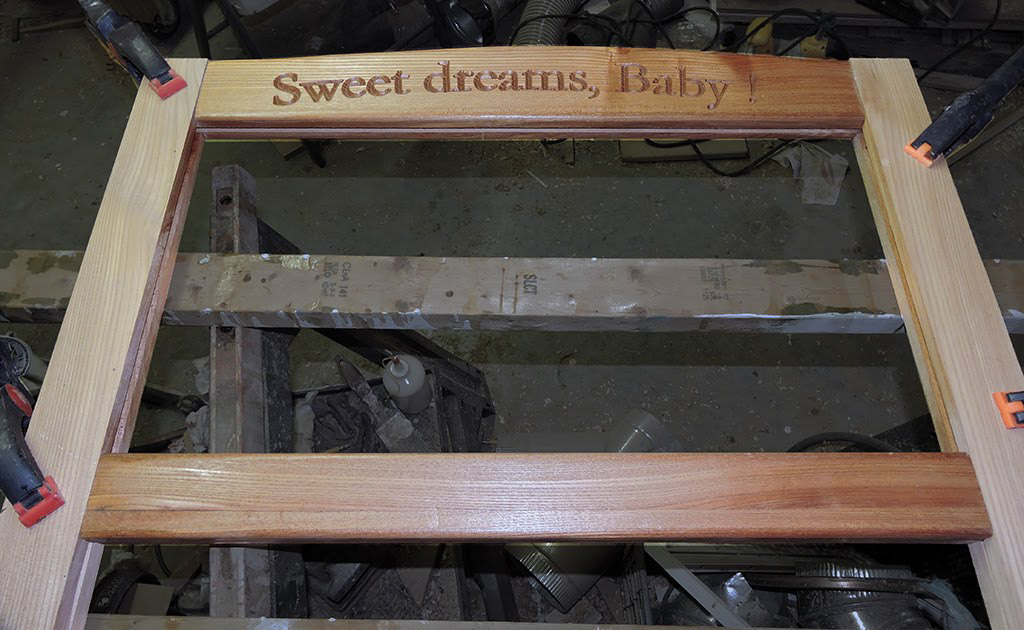
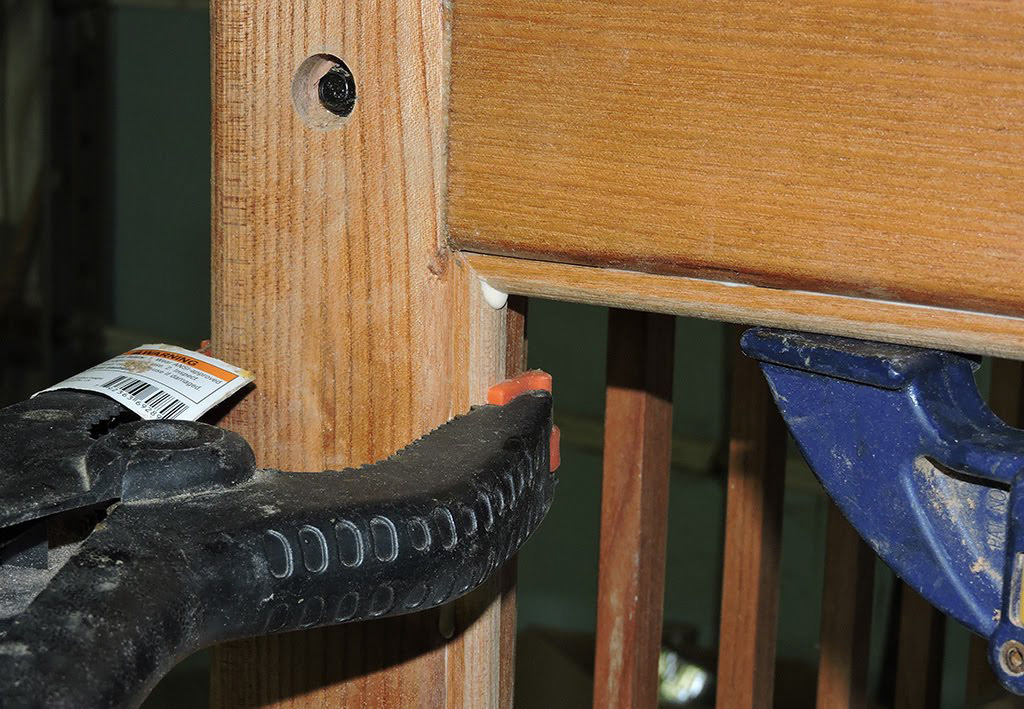
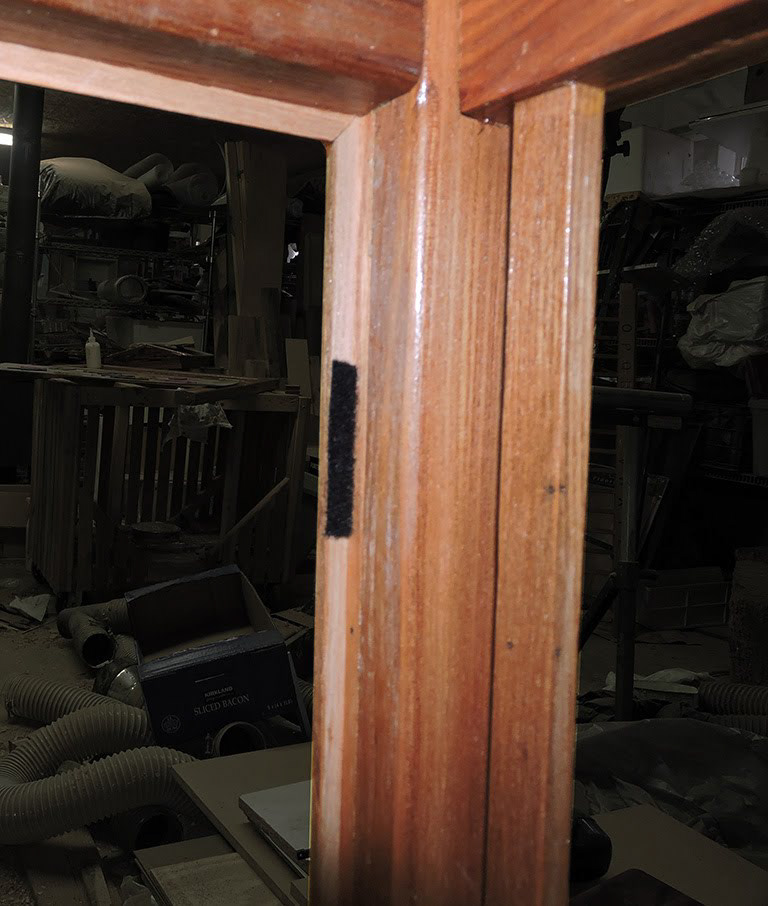
Note that the junction between the 2 components of the top rail is pretty invisible:
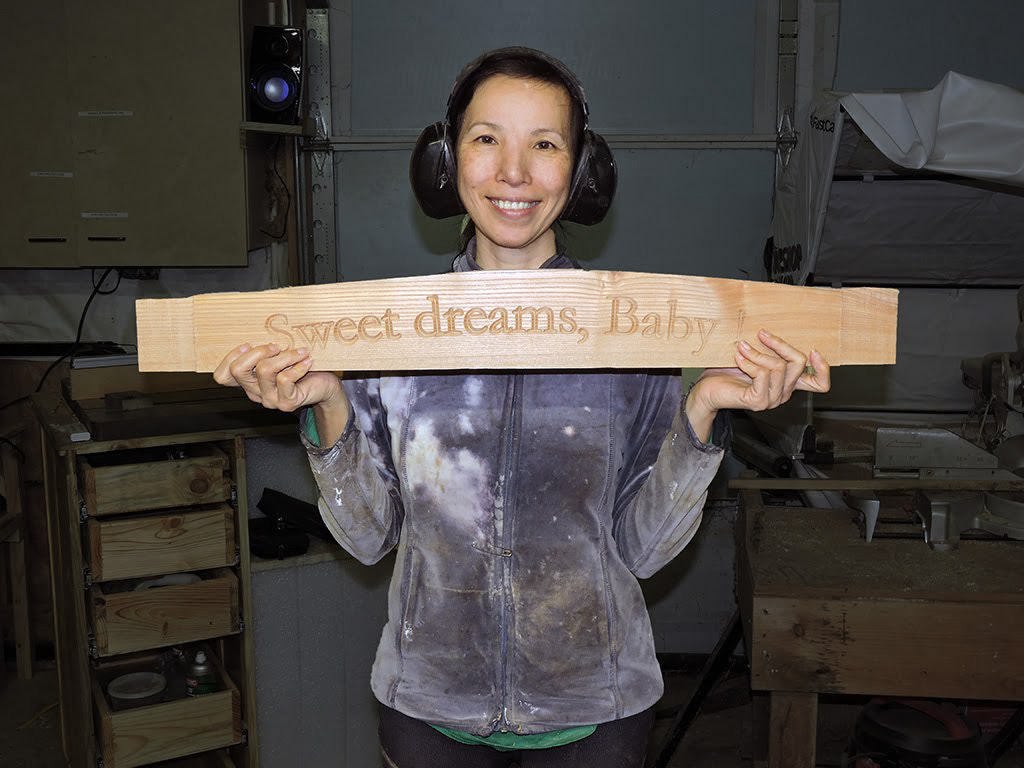
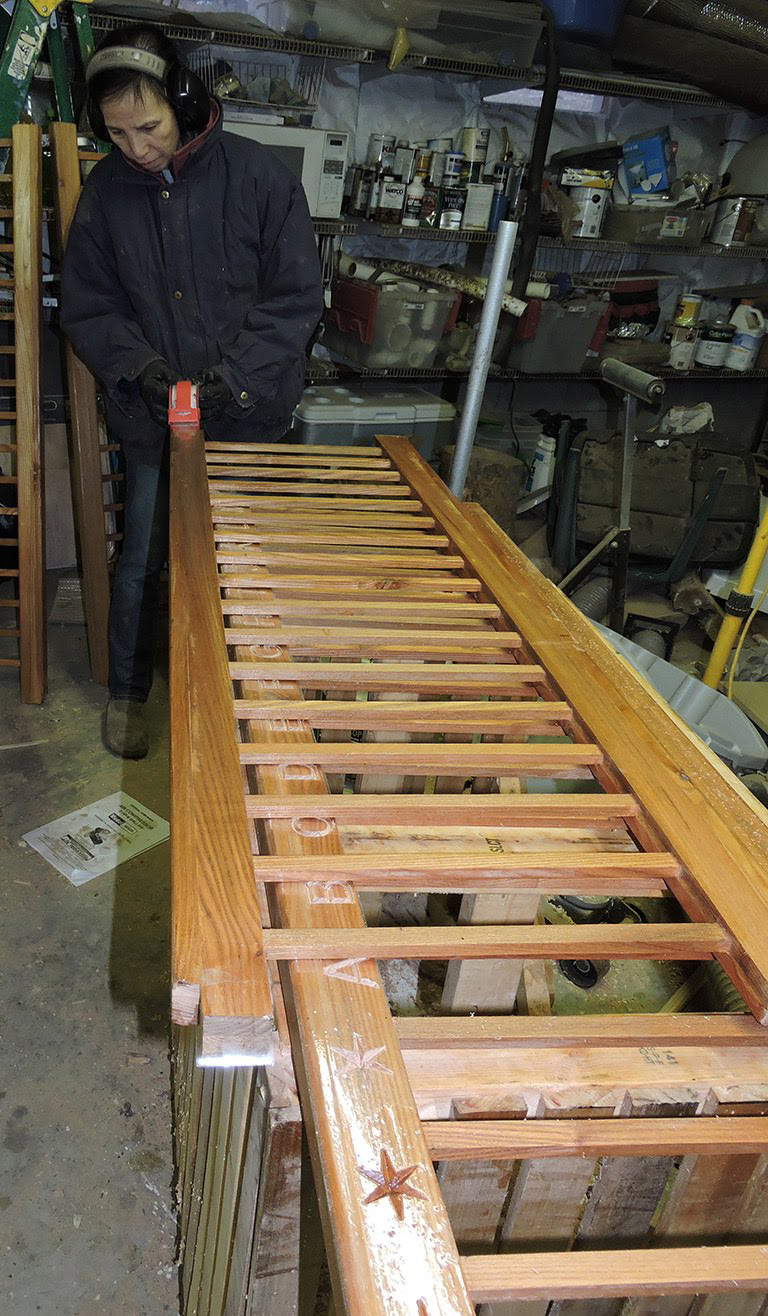
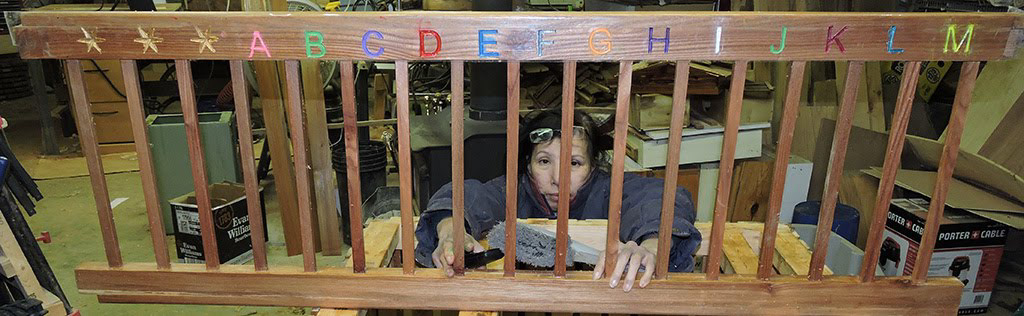
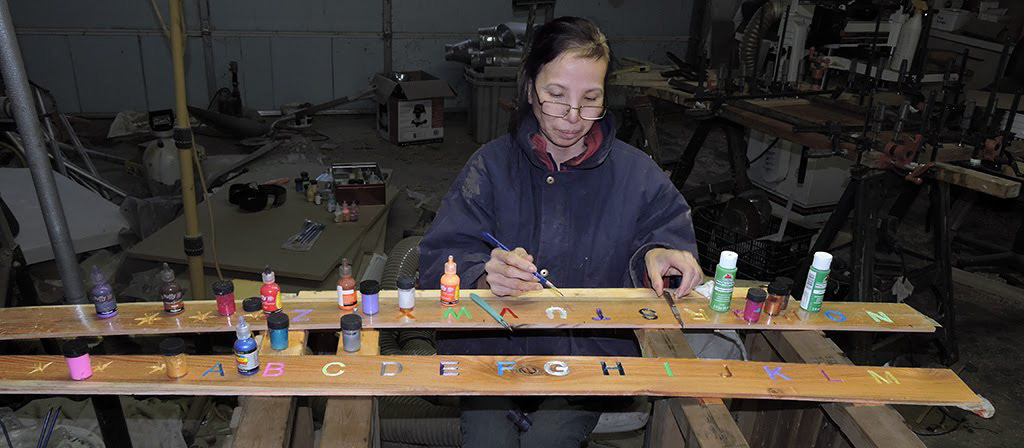
We wanted not only to carve the alphabet along the top rails, but paint each letter to make it more appealing, and of course learning opportunities for the baby!.
To do that the technique is to get the final paint on the board, let it dry then cover the board with a special paint film (Lowes and Amazon did not have so we improvised with packing tape!). Then carve through the tape, fill the carved cavity with the same polyurethane then after that layer dries apply the paint. The reason, for the polyurethane in the cavity, is that otherwise the wood would suck the paint and it would "bleed" all around the letters !! Yikes !!
So first step was apply the packing tape:
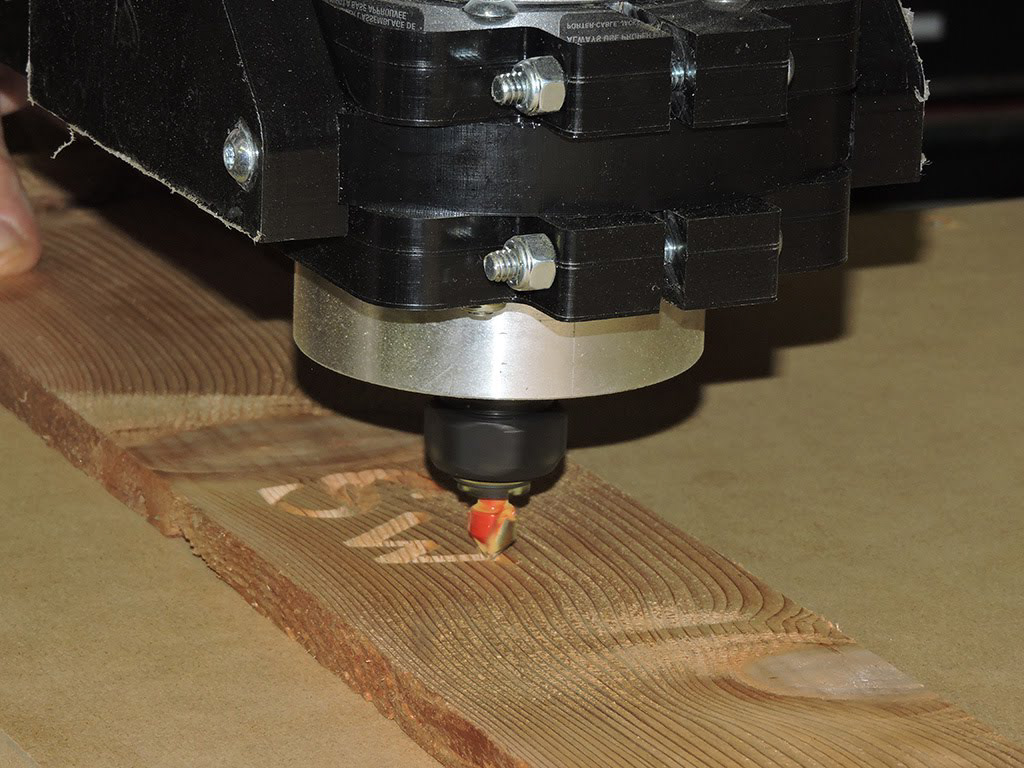
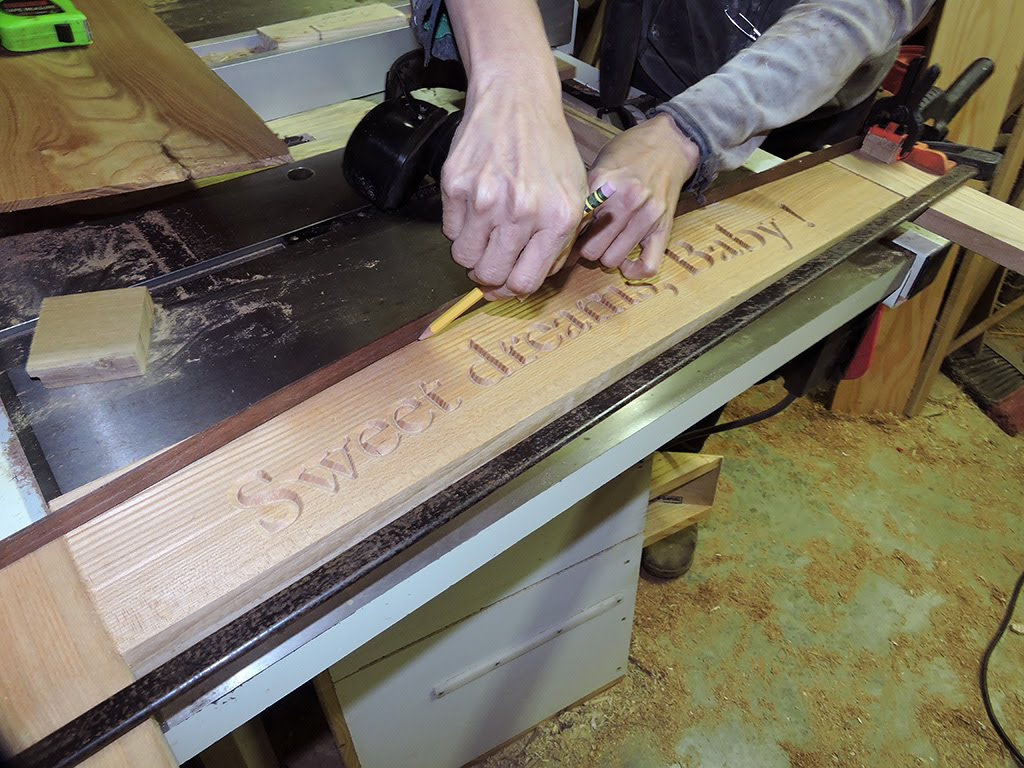
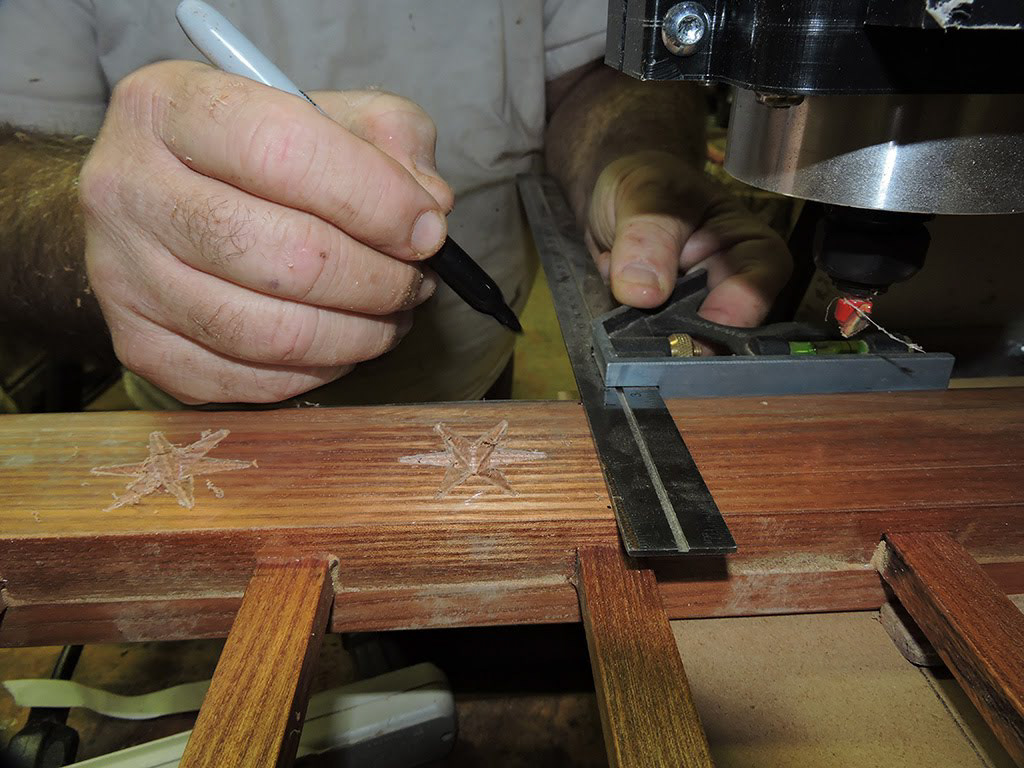
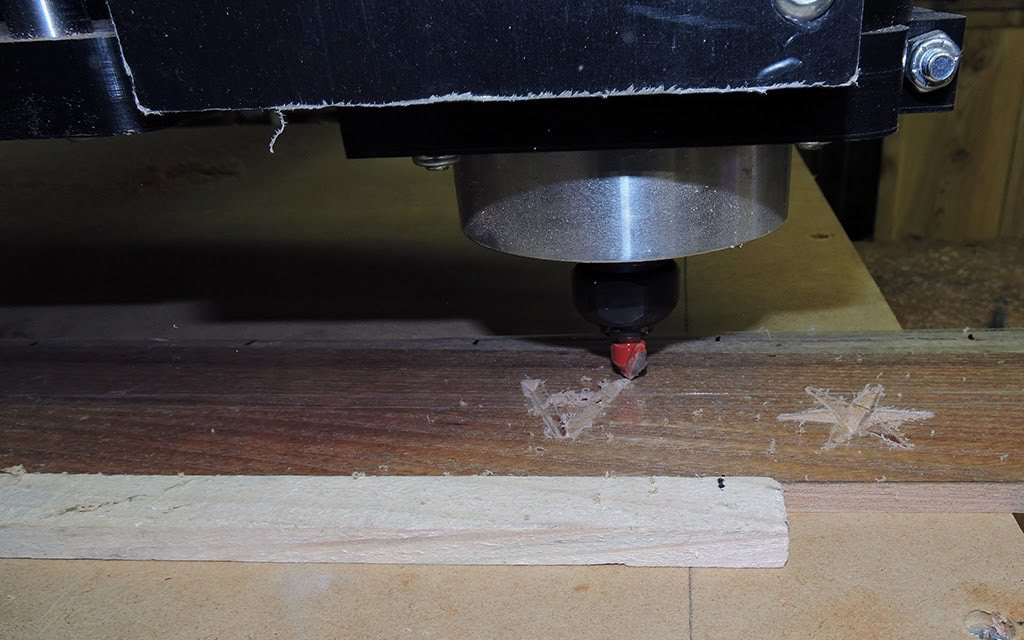
Next: a bold attempt to carve straight onto the rail !
First, it took me some times to figure out how to center the alphabet letters just between the rails. There is probably some clever tool that does that but I did not know. So I designed rectangles that would be the exact width of a "bar + a space between bar" and centered the letters in that rectangle:
Then I could mark the bottom left corner of the A-box on the rail. The CNC cannot handle such a long object so I had to design the text in several segment.
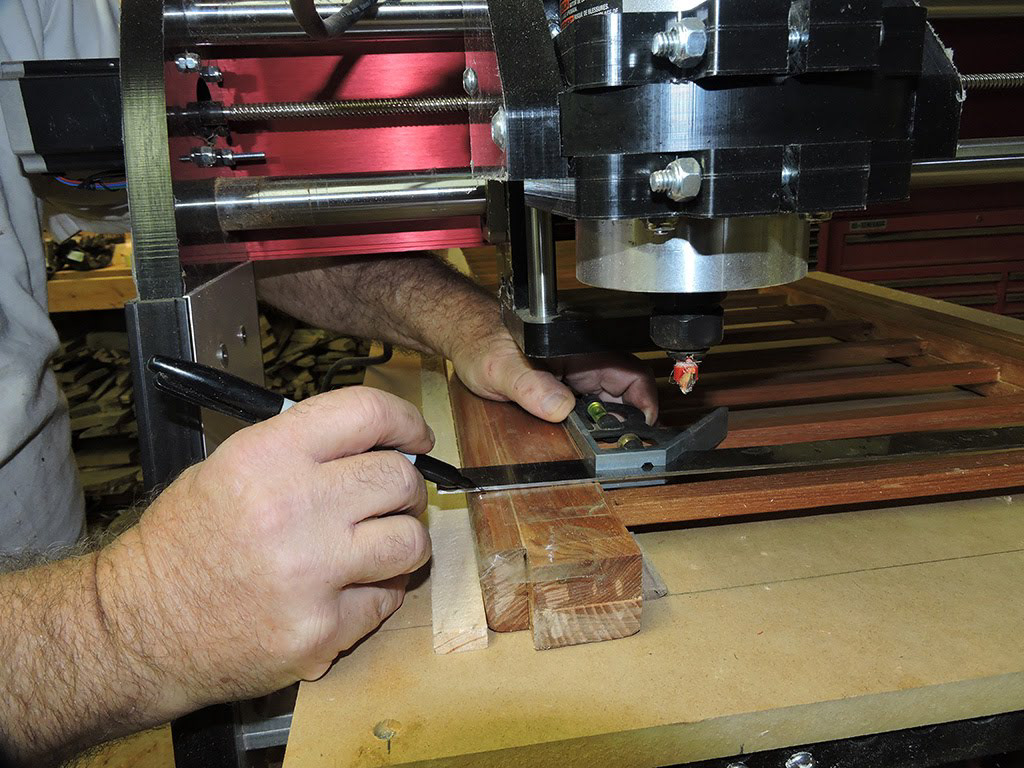
Marking the middle of the vertical bar that will serve a Zero coordinate for the CNC:
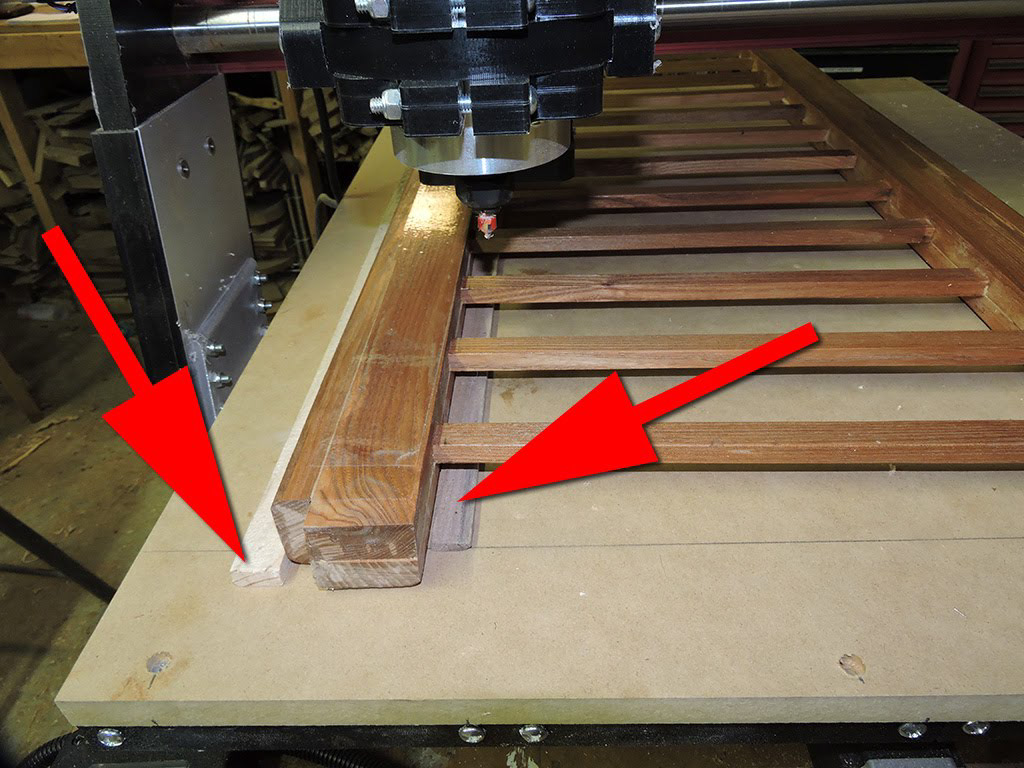
Another problem to solve was hold the rail in position (left to right) when re-positioning between sets of letters. I came up with the idea of fixing a thin strip of wood (red arrows) on either side so that the rail could slide on the Y-axis but remain in the same X coordinate:
Calvin (Calvin and Hobbes) always imagine himself in fantastic situations (Calvin, the Human Rocket...); well here is PJ the Human Clamp (also probably not endorsed by OSHA!)
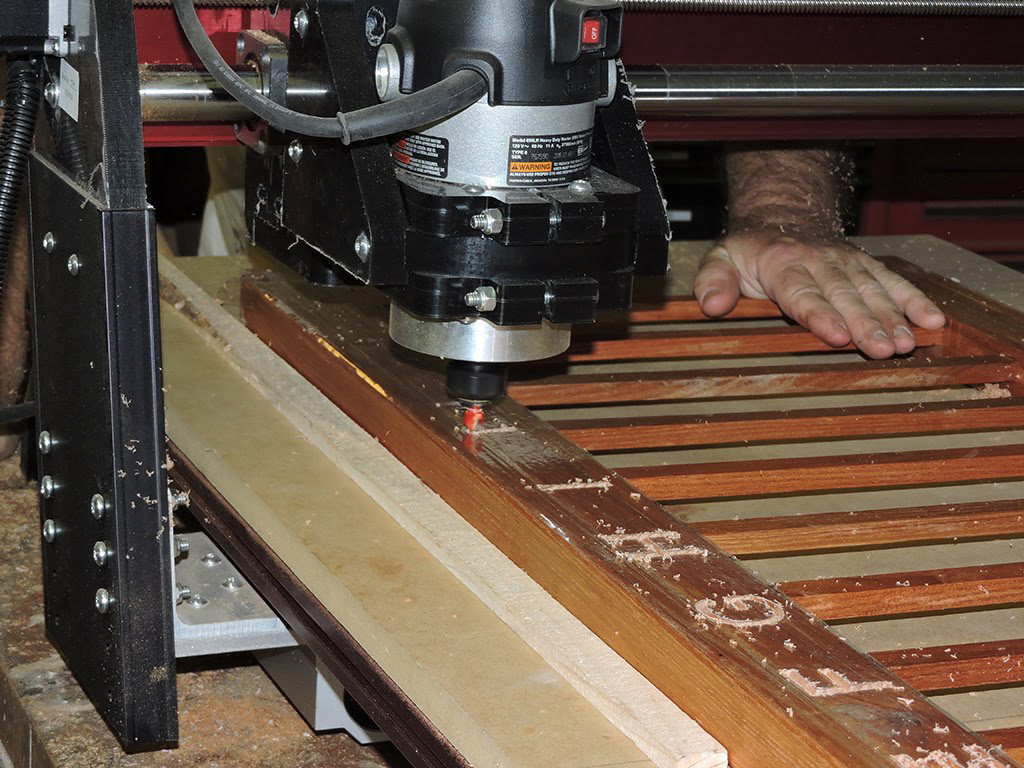
This CNC carving is working great but is fraught with multiple perils ! The width of each letter depends on how deep it is carved and if the 2 boards that made the rail are slightly curved or thickened the letters will look wider or thinner.
Now some colorful paint !
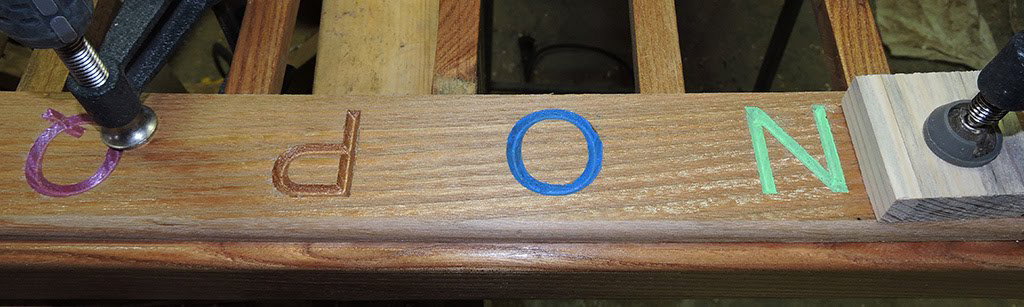
(The edges look terrible but this is on the packing tape that will be peeled later!)
Top: carved AND layer of polyurethane
Middle: Colors applied
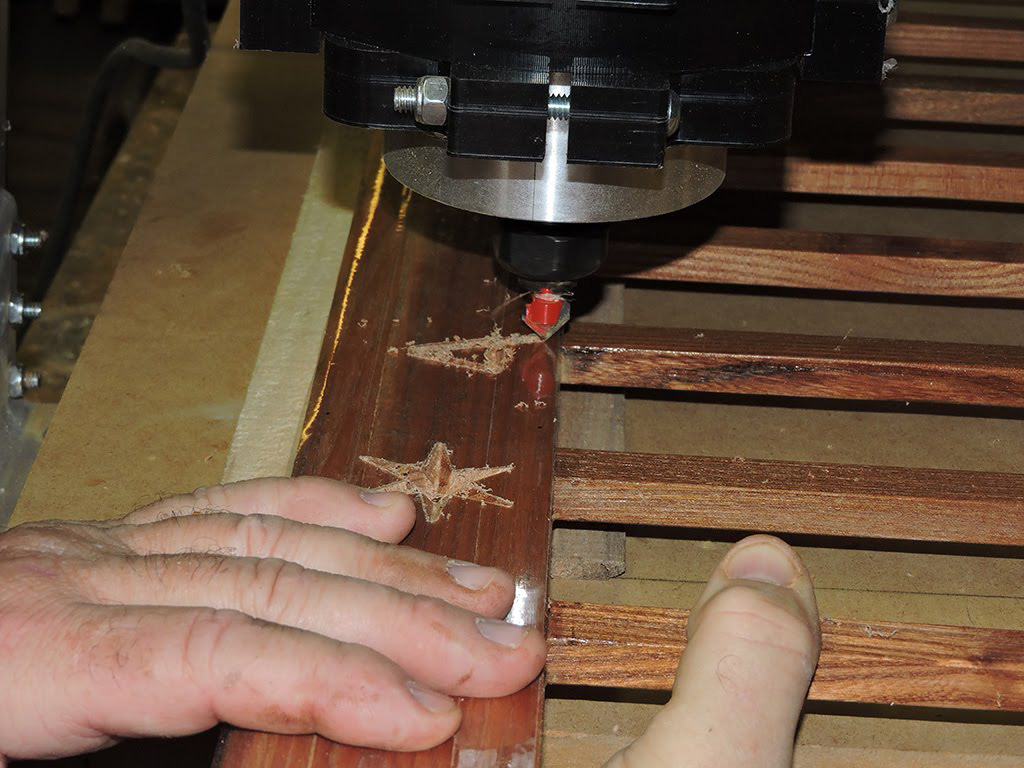
Bottom: Well this will be a 6 star baby ! We had 17 vertical bar on each rails, so 16 inter-bar spaces on each side (32 total), so too much for just the alphabet and not enough to add the 10 digits! So after some agonizing we decided on stars !

The carved and not yet painted rail:

(Thao is very self-conscious about being photographed with baggy dusty old clothes, so she is hiding !!)
... and the painted rail:
(well not hiding too well :) !)
Well big boo boo !! I did not set the origin properly on the CNC and by the time I could intervene, the machine had started to carve a F over the E, making it look like a 6!

AAARRGGLLL !!!!!! I was so pissed at myself !!
I thought I could inset a piece of wood to block the mistake, but that would always look like a "repair". I had to find a better solution.
Finally the solution was simple (all solutions after being found are simple!): make a thin board that would cover the whole side and engrave that thin board.
In practice, the board I had was slightly curved and my jointer is pretty small and would never have correct the curvature. I though of other techniques: cutting on the table saw, but with no good reference edge, the cut would be as irregular as the existing edge. With the band saw I would have more control, but it is easy to slightly deviate holding a 60" board with my neuromuscular control.... Finally the solution of this problem was simple too: carpet-tape a straight edge...
...and use the straight edge as reference for the table saw fence.
That worked perfectly !
There were some further problems to solve:
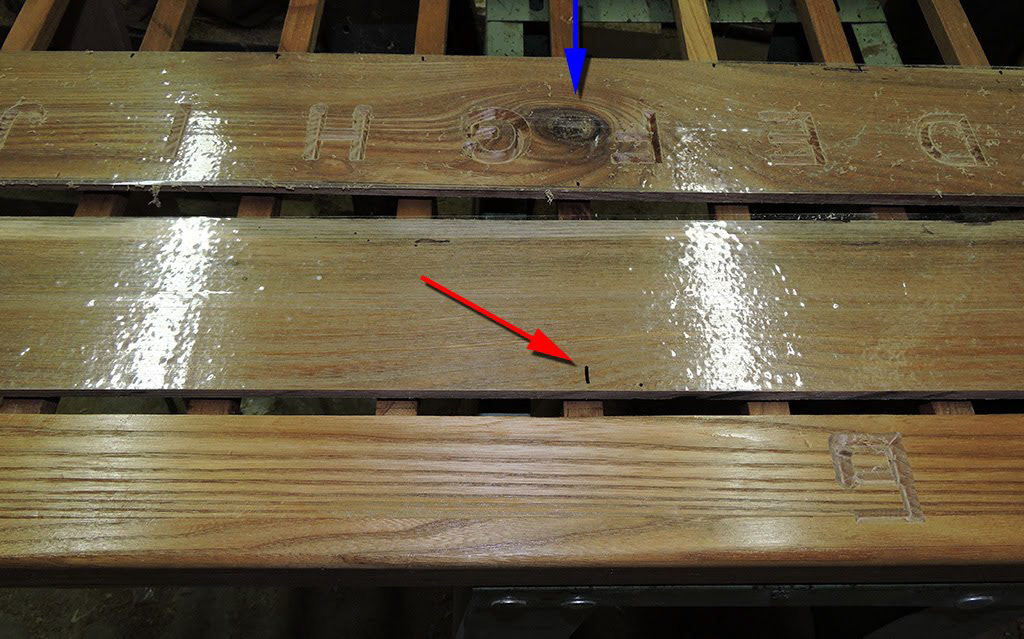
1) how to mark the Zero origin of the various carving file (before I used the middle of a vertical bar for reference). Simple: put the board on the side rail and make mark this way (red arrow)
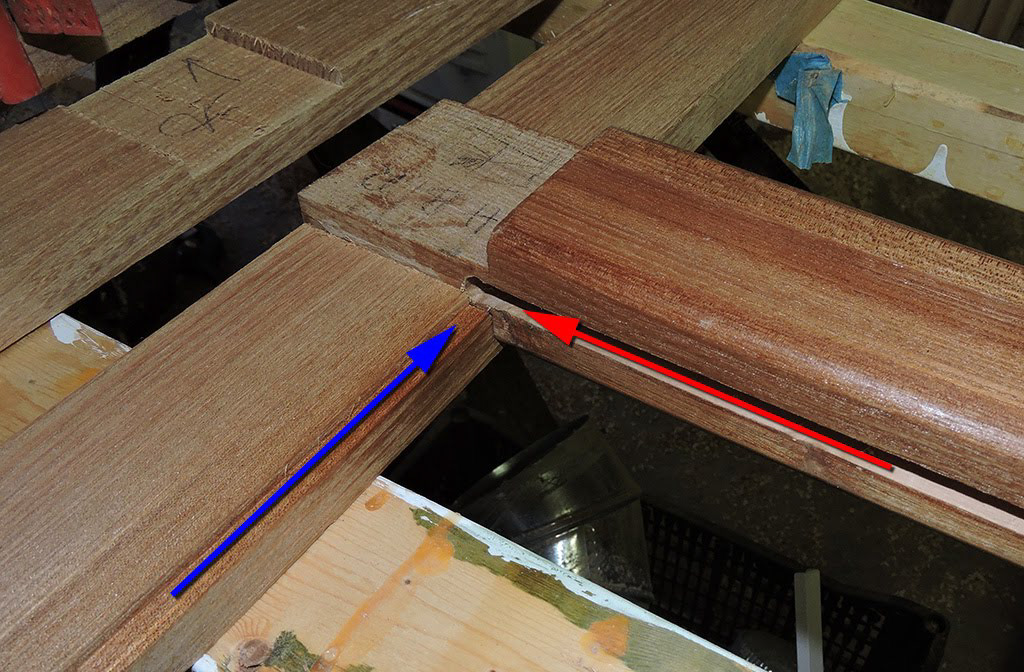
2) one board has a knot (blue arrow), and I like that, but I wanted it to fall between 2 letters, and not "on" a letter !
The boards are very "shinny": that is the protective packing tape that allows to paint more easily.
Back to happy carving, and a dot on the fence marks the zero origin to ease the setup:
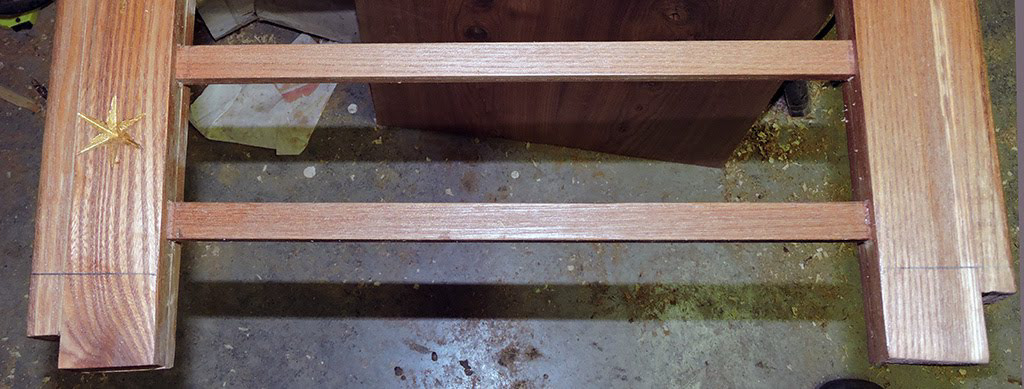
The next step was to prepare the legs. We already had notched them for the mortises
For the head board I wanted to inset the panel inside a groove so that the panel could expand and contract with variation of ambient humidity. A point Don Peschke (Woodsmith.com) always makes !
So we made a rabbet on the router table:
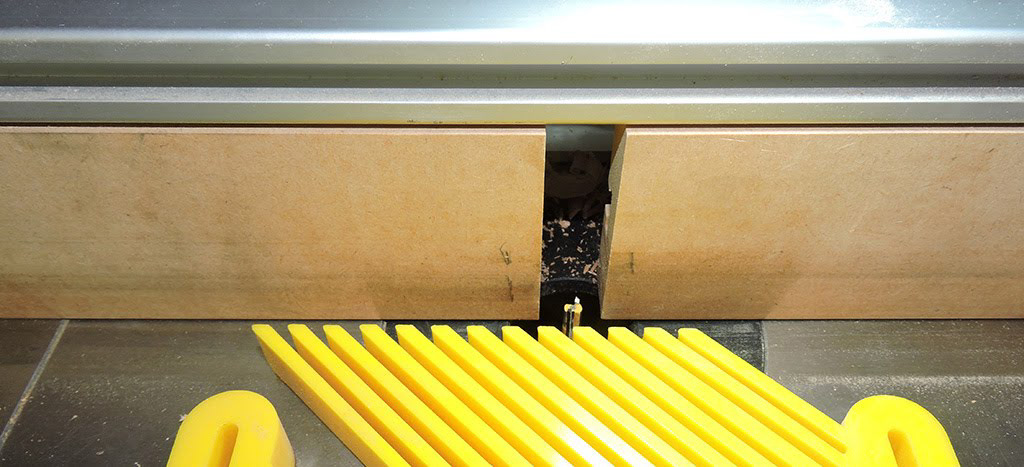
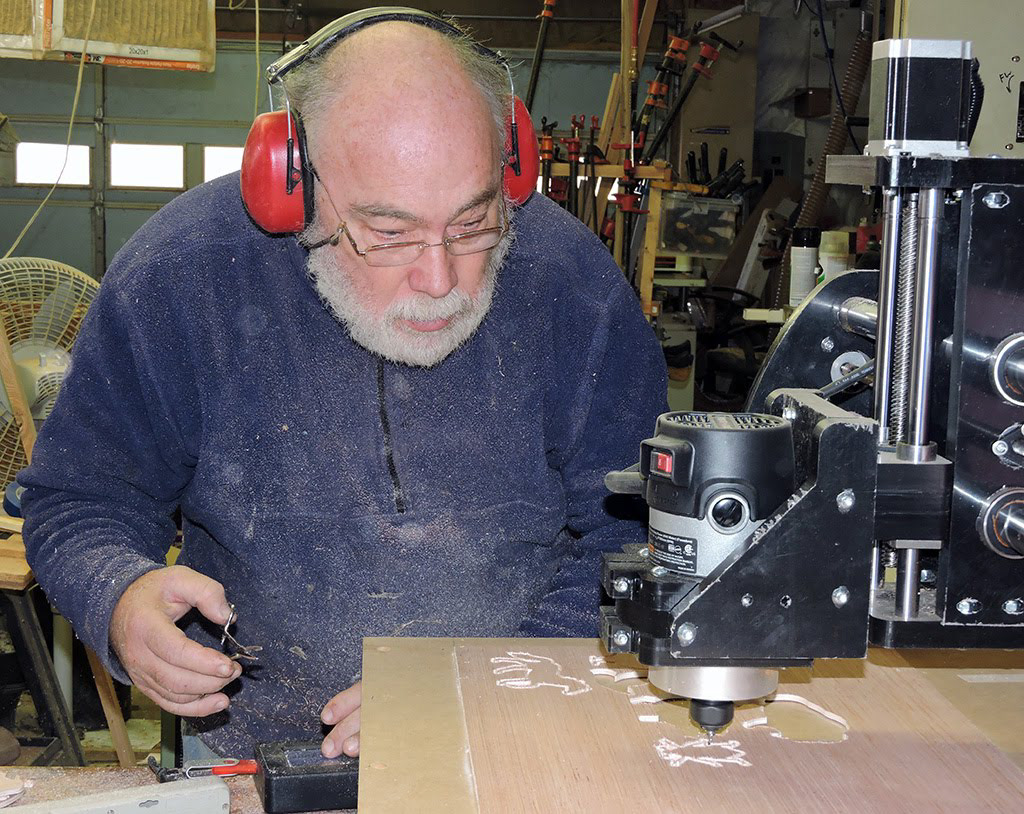
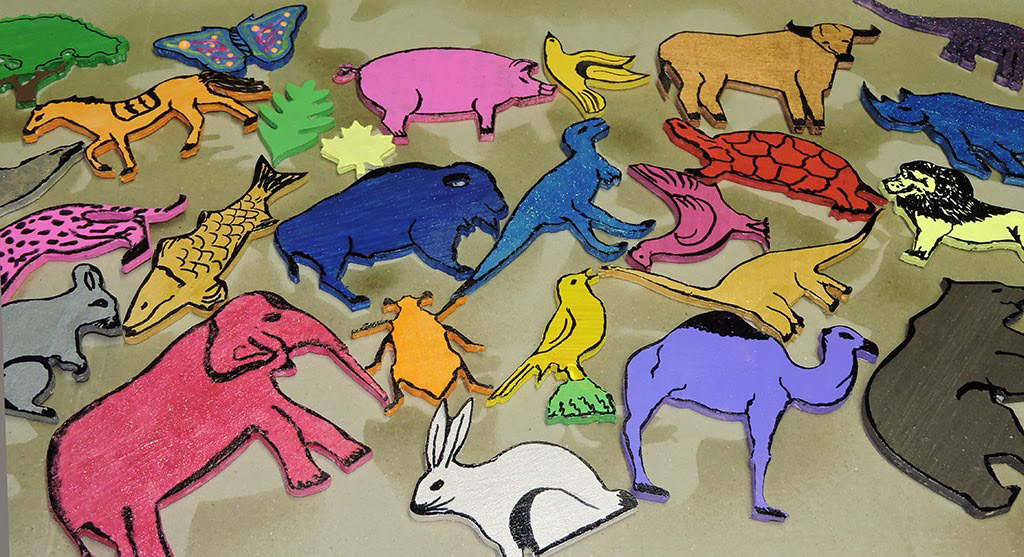
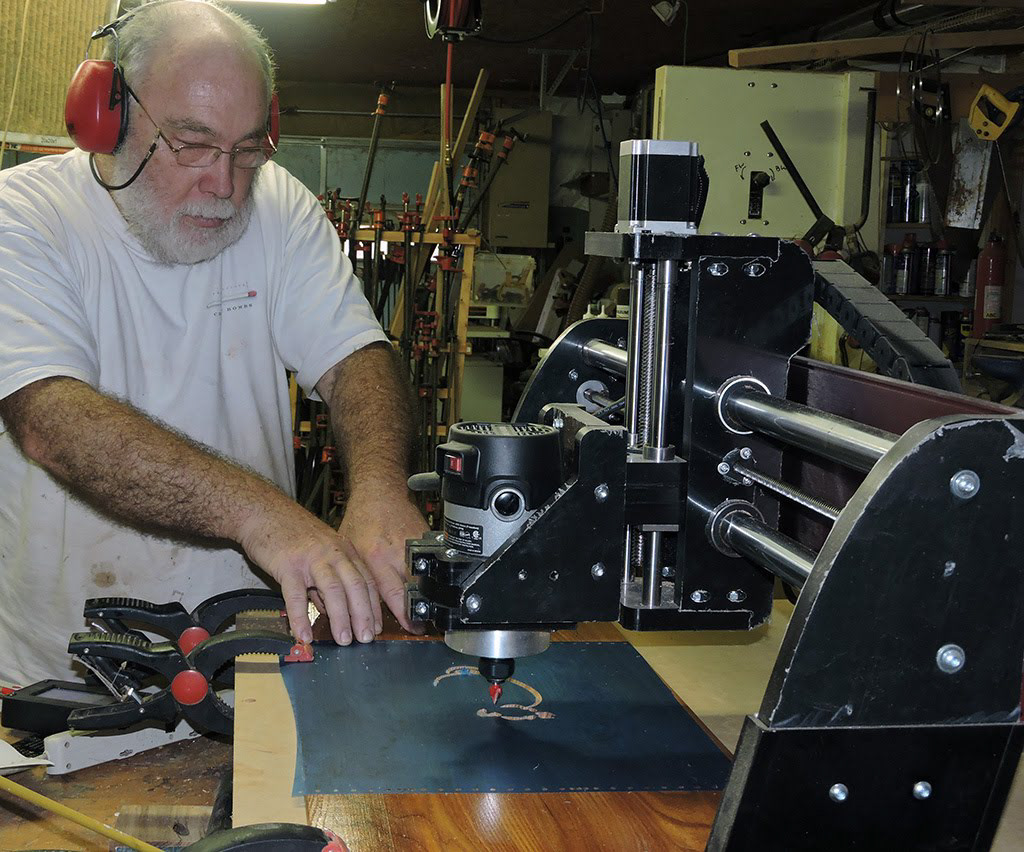
Now CNCing the little decorative animals that Thao will paint. In Cerine's crib Thao had done those on the jig saw and it took a very long time indeed! I am ready with a finger on the "pause button" and a hemostat in the other hand to catch the parts as they are cut.
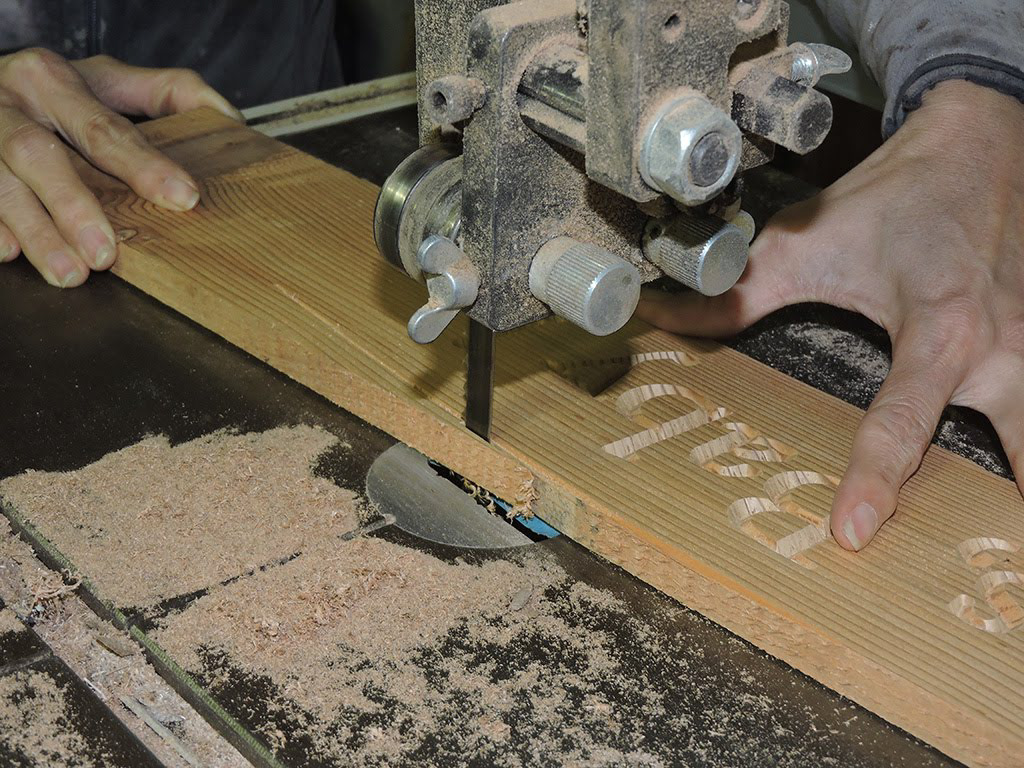
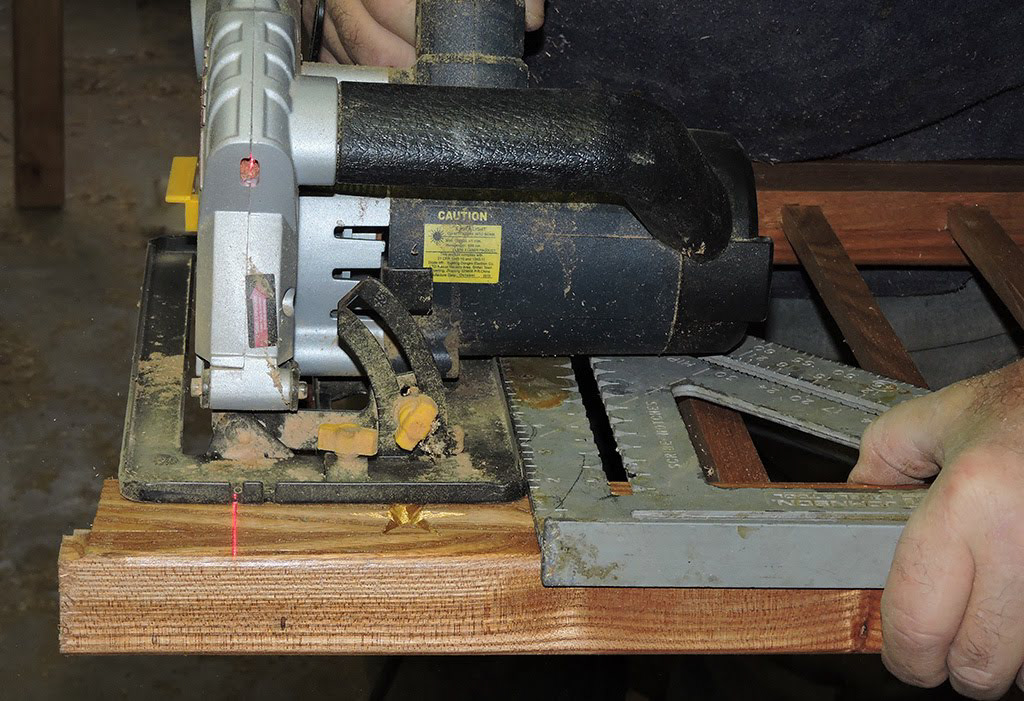
Now the crucial step of cutting the rail to correct length. The "drywall T" is to make sure that the top and bottom of the rail are cut straight and parallel to each other. That drywall T is one of the first tool I bought when coming in the US 35 years ago ! Still not mangled it !

The laser from the Harbor Freight saw is very convenient to align properly!
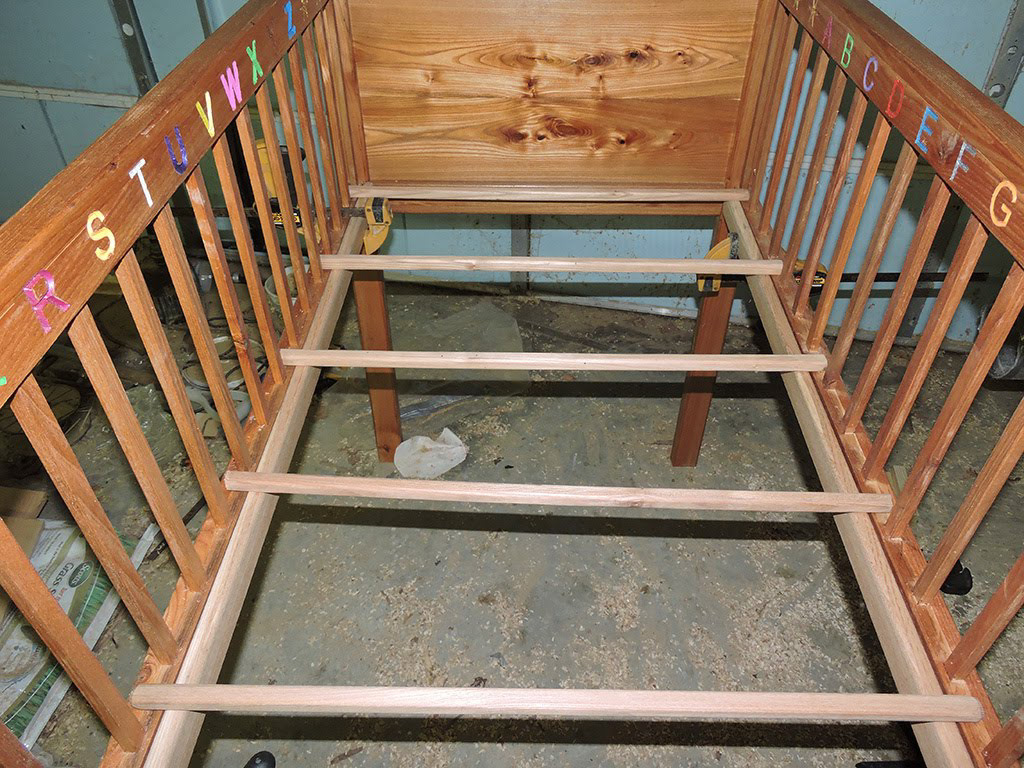
This is starting to look like a crib! We got a mattress to test the measurements. In particular in Cerine's crib I left too much space around the mattress, we corrected this for this crib. Another issue with Cerine's crib was that once the baby is mobile it is tedious to have to lift her into the crib instead of using it as a bed. Fundamentally a rail could be removed and replaced by a single bottom bar, but then no "fall-out" protection would be left. So for this crib we decided to make a removable foot board. This would permit the kid to climb into the bed by the opening in the foot board. The panel covering the opening during the "newborn-toddler" stages will be attached at the bottom by a groove (bottom left of the image) and maintained on the 3 other sides by quarter-round profile on the external side. The foot board panel can then be velcro-ed in place. When much older and fall-out protection is no longer needed, the side rail can then be removed.
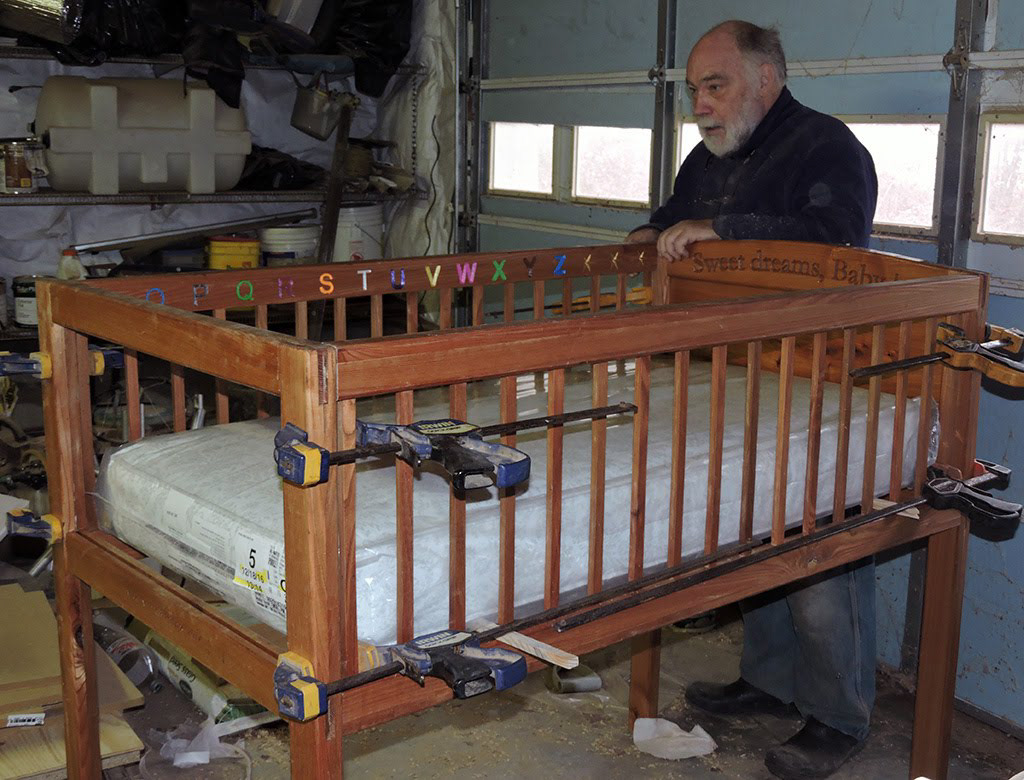
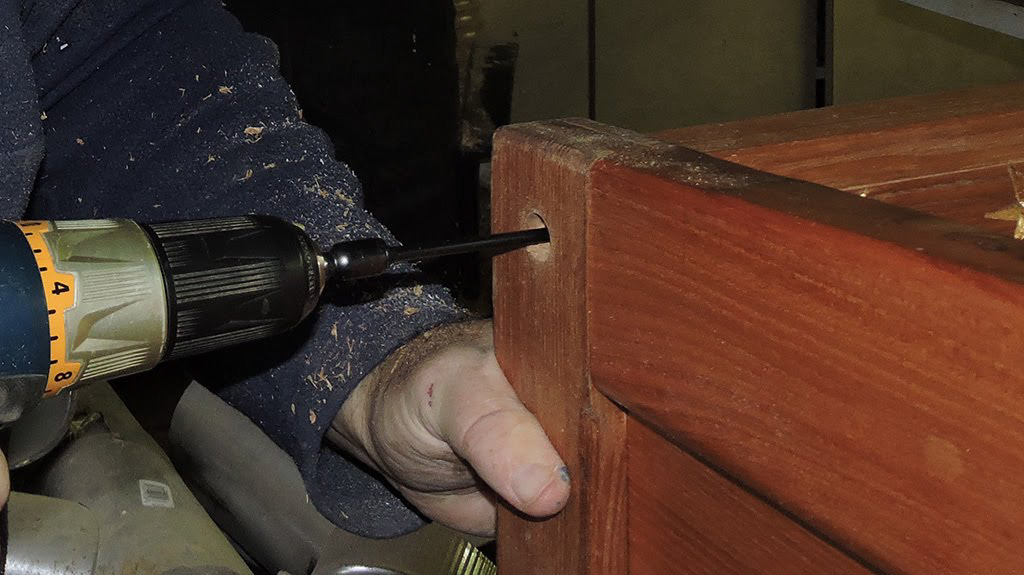
The rails are attached to the end boards with 6" Timberlok screws: solid enough for me to lay in the crib, and easily removable.
The mattress in the "newborn" position: easy to access with not much rail guard. When the baby grows (turn on his belly = 6 month, cruise with support 10 months), the mattress can be moved to the toddler position, making the rails higher. The legs of the crib are probably too high: we will check with the mother what height she prefers: custom-designed crib !
he 1/4 round strip that will prevent the foot board panel from falling off (yes a little generous in glue, there, Philippe !)
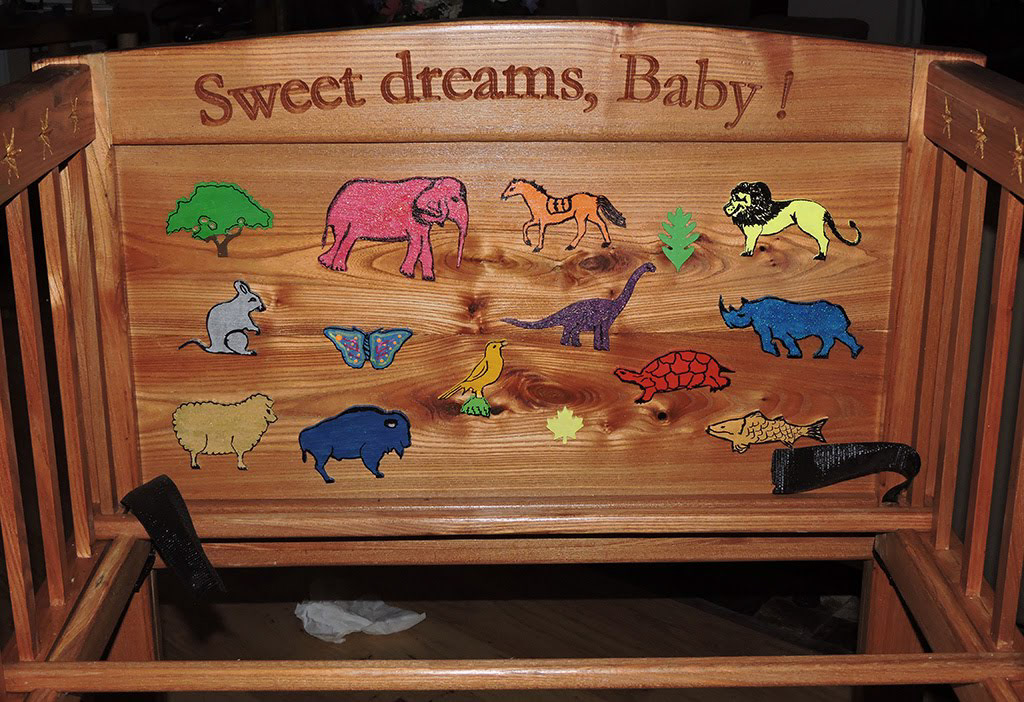
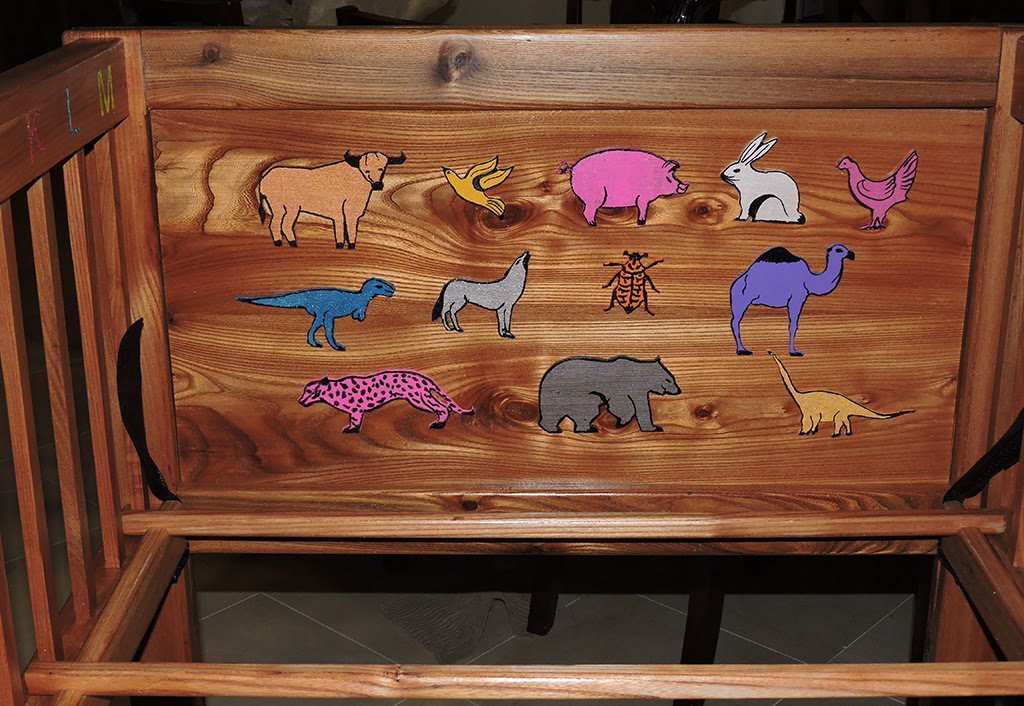
The little animals painted by Thao:
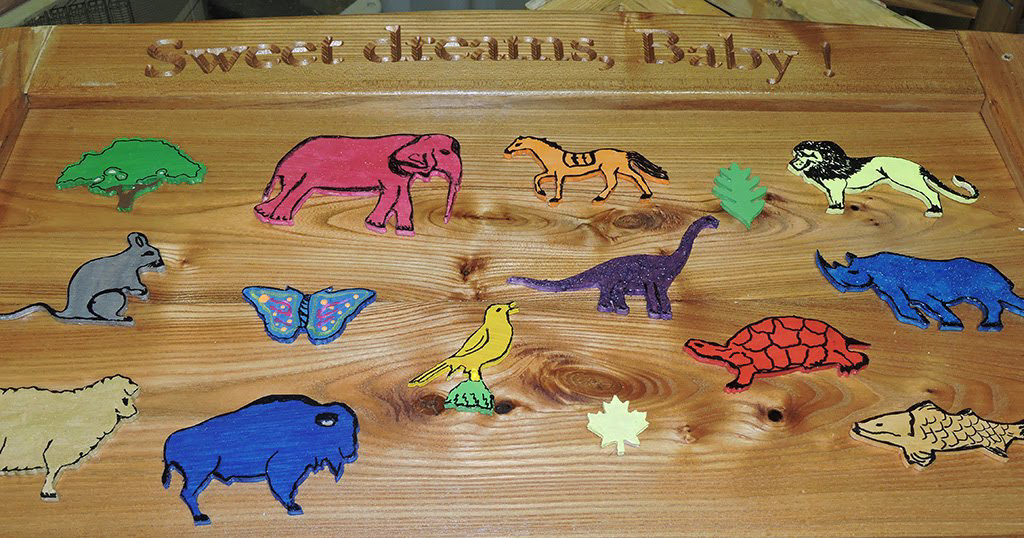
... and glued on the head board:
Carving the external side of the foot board panel. We now got the "good film" for carving, (Oramask 813), but still it detaches when carving lines are close to each other :(
The foot board panel is secure and won't rattle with little strips of velcro:
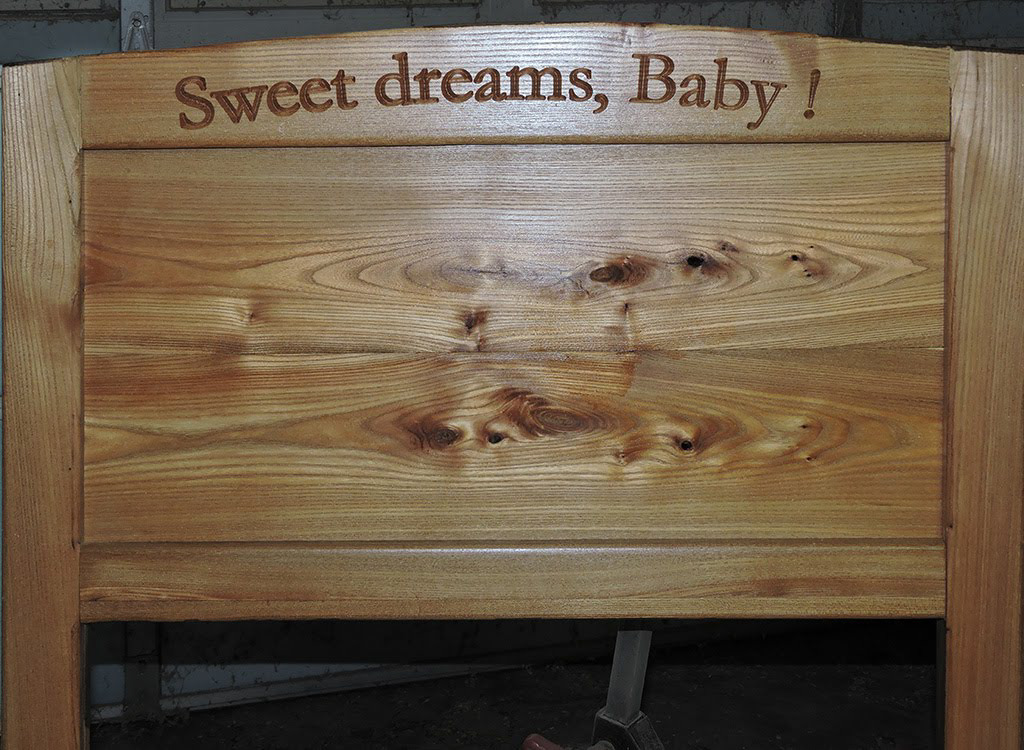
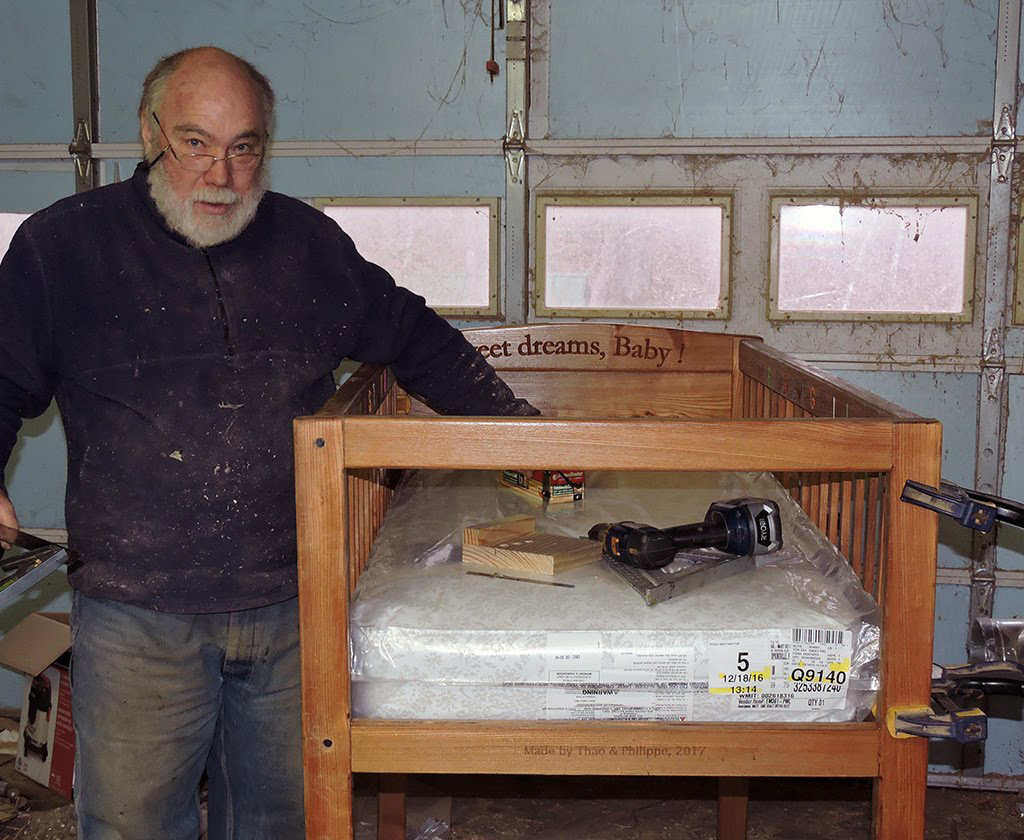
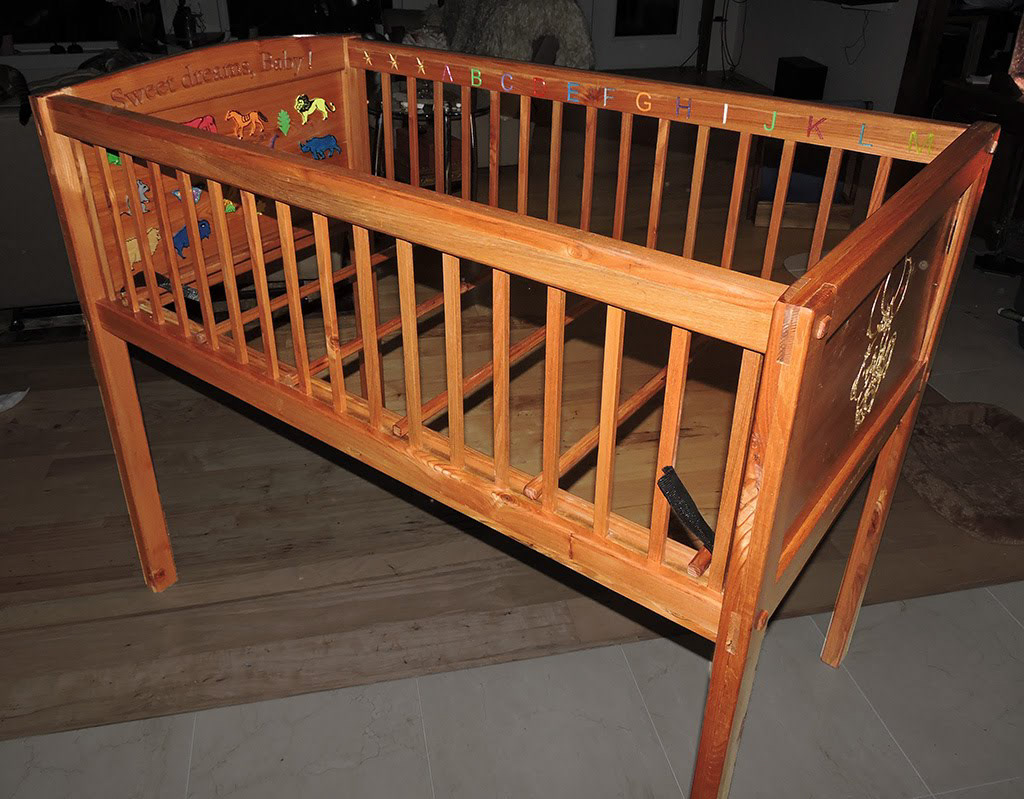
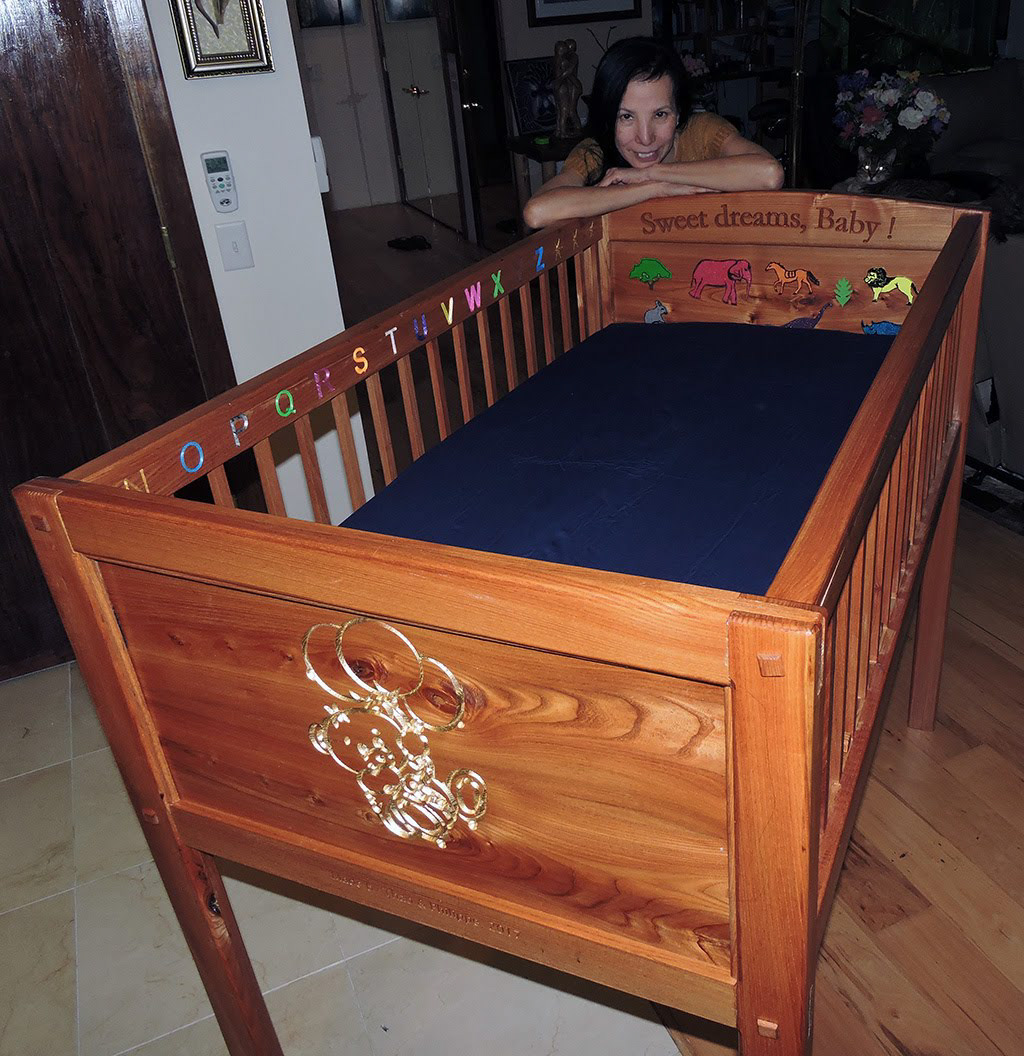
... and... Tadaaa... the final product !
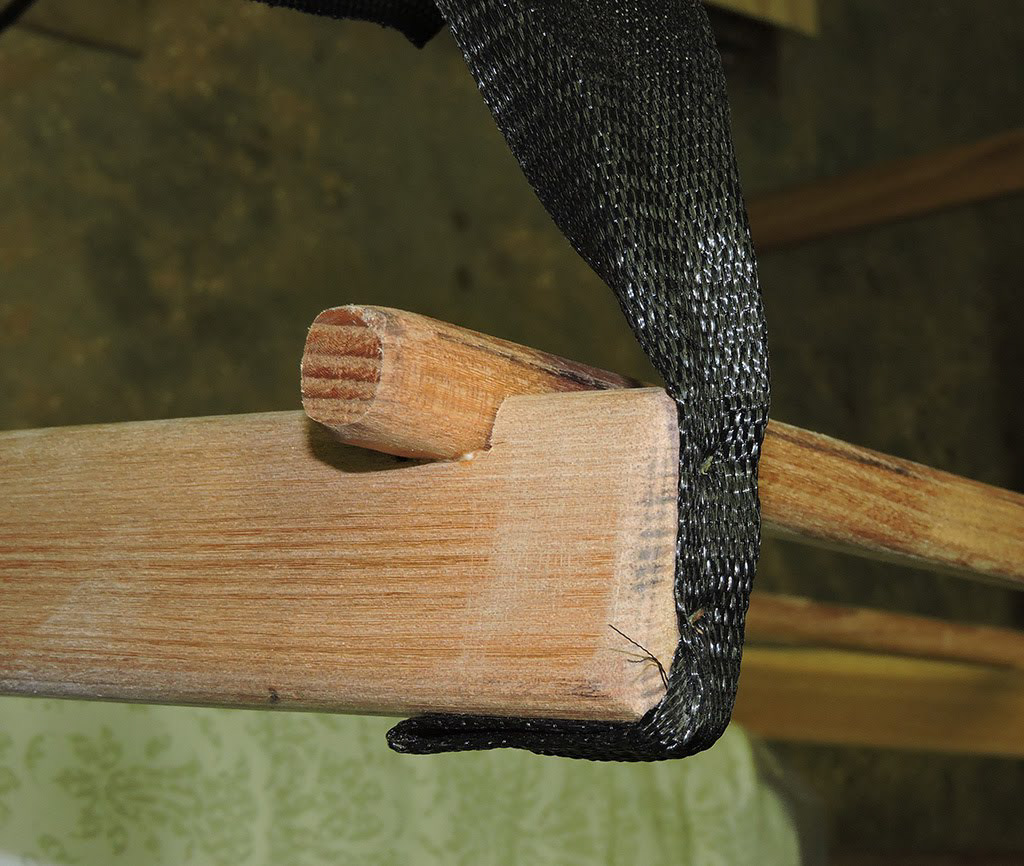
The head board (yeah, the nylon straps are not too pretty :( ):
The inner side (baby side) of the foot board:
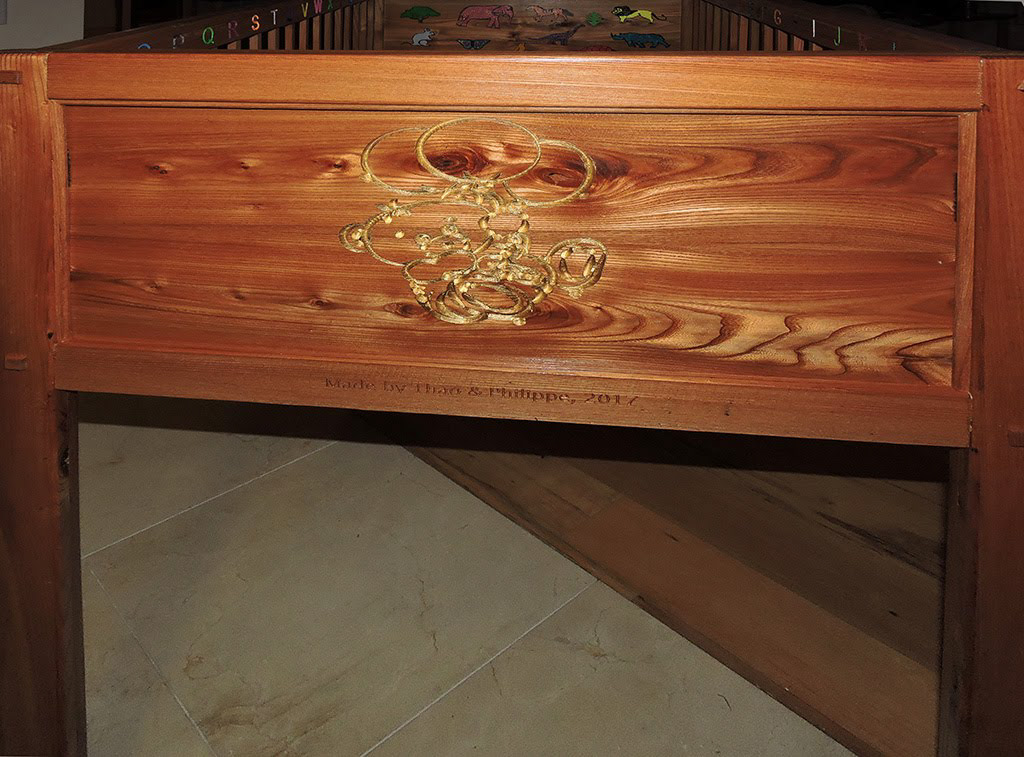
The external (mom) side of the foot board with the golden bear and balloons (and the name of the artisans :) )
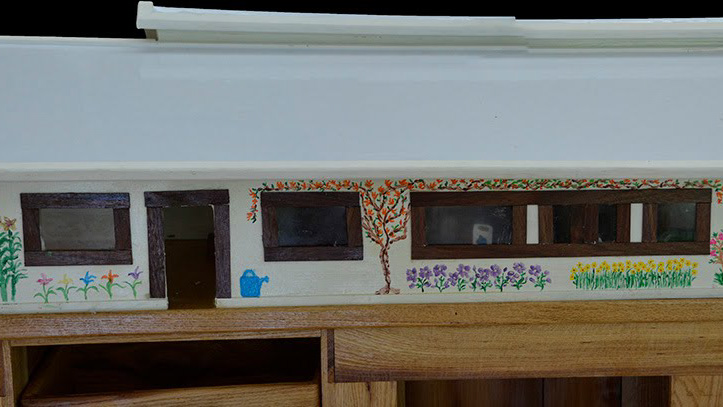
With the mattress and fitted sheet. When the baby is older then 9 months, the mattress can be lowered and the rest of the animals will become visible.
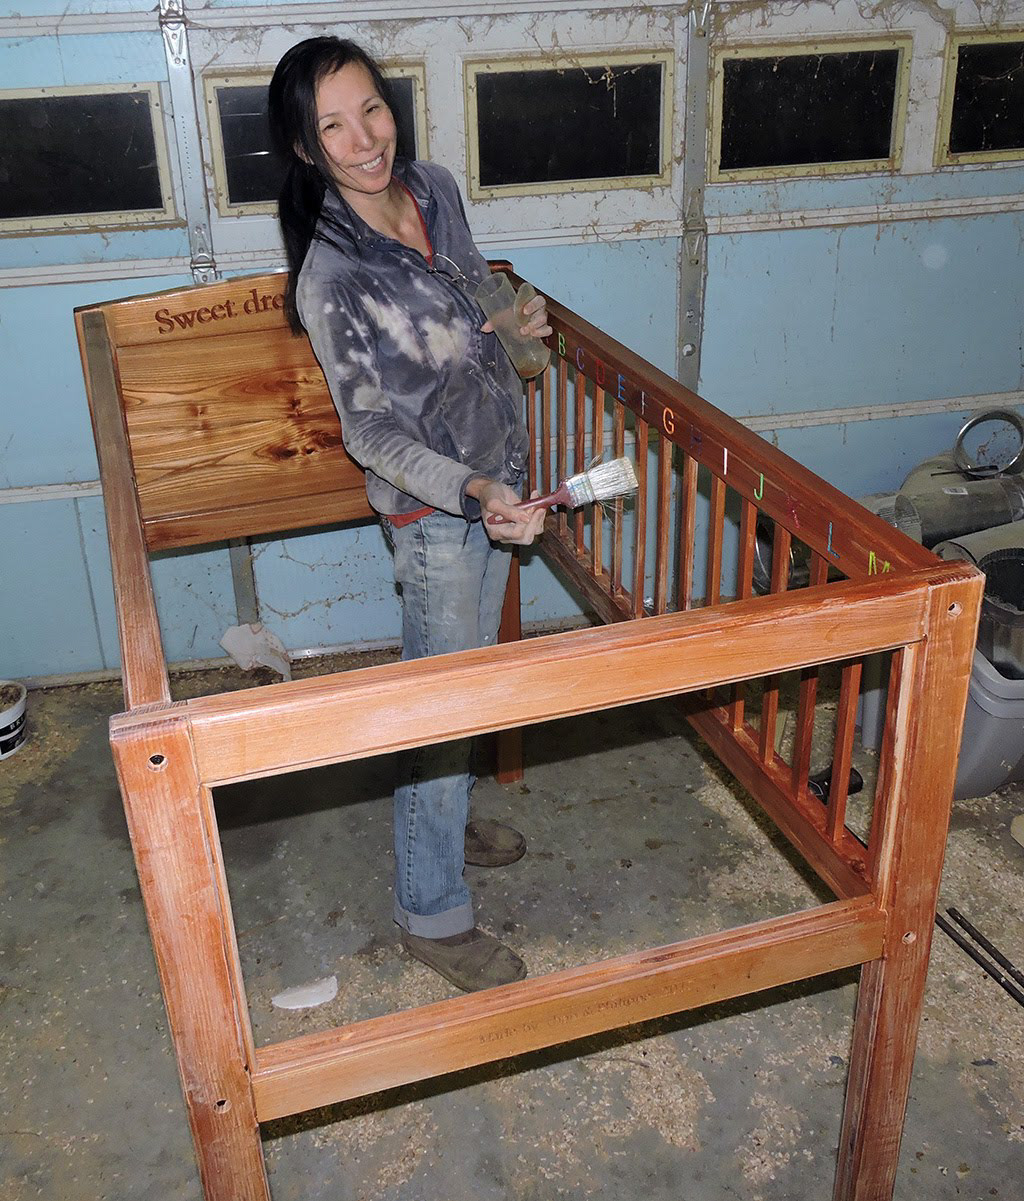
Thao finally out of her dusty tool-shop clothes !
A fun project with many challenges ! Reading all those old magazines from WoodSmith has been fun and very instructive for me!